

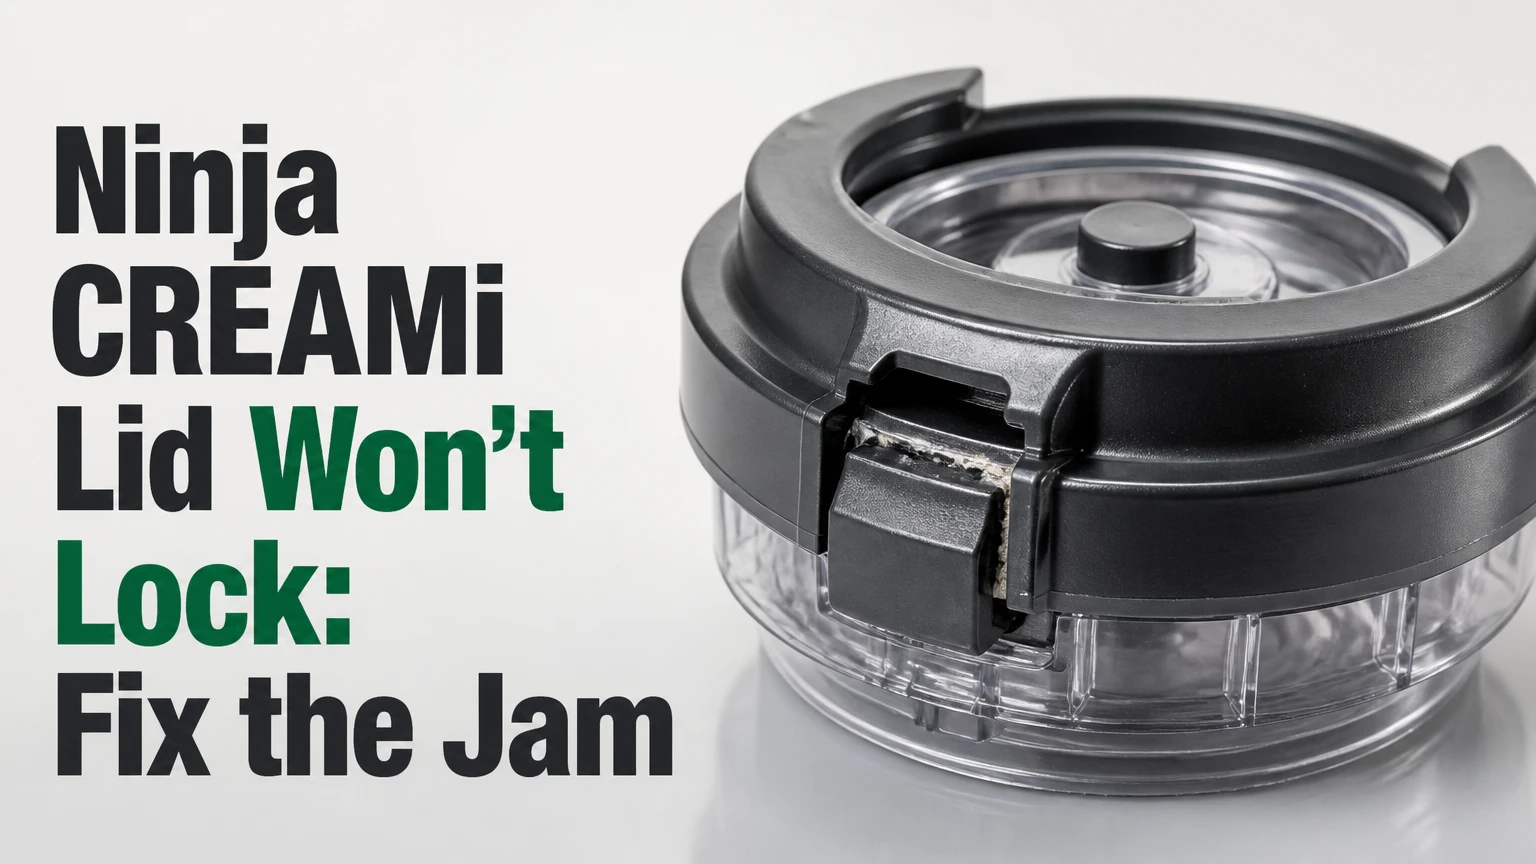
A Ninja CREAMi lid that won’t lock usually has a physical assembly problem, not a failed motor. The common causes are an incorrectly seated pint, a frozen mixture above the proper level, a paddle that is not fully clipped into the processing lid, dried residue, or a damaged locking tab. The correct fix depends on which connection refuses to engage.
Key Facts / Quick Answer
A lid that will not twist onto the outer bowl points first to pint height, paddle seating, residue, or lid-tab alignment.
A bowl that will not rotate into the motor base usually indicates incorrect bowl orientation, a mis-seated outer bowl, or a dirty locking track.
Scrape a frozen hump level before processing, and never force the handle past resistance.
Unplug the machine before cleaning, inspecting the spindle, or trying to release a bowl after an interrupted cycle.
CREAMi models use different bowls, paddles, and locking geometry. Confirm the model number before ordering a replacement.
Typical replacement costs range from about $15-$30 for a paddle or lid component and $25-$50 for an outer bowl, excluding unusual bundles or shipping.
Which Lock Is Failing?
The Ninja CREAMi has three separate engagement points: the paddle clips into the processing lid, the processing lid twists onto the outer bowl, and the assembled bowl locks into the motor base. Identifying the failed connection reduces troubleshooting time because a frozen pint cannot explain every lid-to-base problem.
Paddle does not lock into the processing lid
Turn the processing lid upside down and inspect the paddle hub. The paddle should be inserted straight into the center opening and pushed until the retaining mechanism holds it securely. If the paddle drops out when the lid is inverted, stop using that assembly.
| Observed symptom | Most likely area | First check | Typical action time |
|---|---|---|---|
| Paddle falls out of inverted lid | Paddle hub or lid retainer | Dried mixture, cracked hub, incomplete insertion | 2-5 minutes |
| Lid will not twist onto outer bowl | Lid tabs, pint height, frozen surface | Hump, overfill, gasket position | 1-5 minutes |
| Outer bowl will not enter base | Bowl track or base receiver | Bowl orientation and clean tracks | 1-3 minutes |
| Bowl locks but INSTALL remains lit | Interlock position or component seating | Lid, paddle, bowl, and power state | 5-10 minutes |
| Handle stops abruptly during removal | Frozen pressure or jam | Unplugged machine and thaw time | 10-30 minutes |
The Ninja CREAMi Owner’s Guide for applicable models warns, “DO NOT process the container if the paddle is not installed.” Model wording varies, so use the manual supplied with your exact machine as the controlling instruction. A paddle that is loose, cracked, or visibly distorted should be replaced rather than held in place by hand.
Lid locks to the bowl but the bowl will not lock to the base
A correctly assembled outer bowl normally enters the base in a defined position and rotates through the locking path. If the handle stops before the normal locked position, remove the bowl and check the underside, the base receiver, and the bowl rim for ice cream residue or foreign material.
Do not press the bowl upward while twisting with force. Excess pressure can load the plastic track unevenly and damage the tabs that establish the safety position.
The machine shows INSTALL after assembly
A blinking or illuminated INSTALL indication generally means the machine does not recognize the required assembly position. The exact indicator behavior differs across CREAMi generations, including original, Deluxe, Breeze, and newer variants.
The INSTALL message does not prove that an infrared sensor has failed. Ninja documentation and product designs can differ, and users rarely have enough information to identify the internal sensing technology. Treat the message as an assembly or interlock warning first.
Why Won’t the Processing Lid Twist On?
The processing lid will not engage when the paddle, pint, gasket, or frozen contents prevent the lid tabs from reaching their intended track. The fastest check is to remove the lid, remove the inner pint from the outer bowl, and test the empty lid and bowl separately. This separates a food-height problem from a damaged plastic component.
1. Flatten the frozen surface
A frozen hump is one of the most frequent reasons the blade-bearing lid cannot sit low enough. Liquid freezes unevenly, especially when the pint is placed on a tilted shelf or when the recipe contains thick inclusions that migrate during freezing.
Remove the storage lid and inspect the surface. If the center or edge rises above the surrounding frozen base, scrape the high area flat with a spoon before installing the processing lid. Remove loose ice fragments rather than pushing them into the sidewall.
Do not process a pint that has expanded beyond the marked fill limit. Expansion can press the frozen block against the paddle and increase stress on the lid assembly.
2. Check the MAX FILL line and pint condition
The MAX FILL line is a physical capacity boundary, not a suggestion for adding extra liquid. Ingredients containing water expand while freezing, and a mixture that was level before freezing can become difficult to process after expansion.
| Pint condition | Processing decision | Reason |
|---|---|---|
| Surface is flat and below MAX FILL | Proceed after assembly check | No visible height obstruction |
| Small hump above a level surface | Scrape flat first | Paddle may contact the raised ice |
| Mixture expanded past MAX FILL | Do not process as assembled | Expansion can obstruct or overload the paddle |
| Pint wall is cracked | Discard the pint | Structural failure can worsen during processing |
| Pint is visibly warped | Do not rely on it for alignment | The lid and bowl may not seat evenly |
| Surface contains large hard inclusions | Remove or follow recipe guidance | Hard pieces can damage the paddle |
A pint that repeatedly freezes with a large crown may have excessive fill, an unsuitable recipe ratio, or a freezer position that is not level. Correct the preparation method before replacing the machine.
3. Reseat the paddle and inspect the gasket
Clean, dry the paddle, and inspect the central hub for cracks, bent metal, or hardened ingredients. Then inspect the processing-lid gasket, where fitted, for displacement, food residue, swelling, or a section that has rolled out of its channel.
A gasket should lie evenly in its groove. It should not be stretched, folded, or forced into place with a sharp tool. If the seal is torn or permanently deformed, obtain the correct replacement for the model rather than substituting a generic ring.
4. Test the components without the frozen pint
Place the empty pint in the outer bowl, attach the processing lid according to the manual, and check whether the lid completes its normal rotation. If an empty, clean assembly locks but the filled pint does not, the frozen contents or pint geometry are the stronger suspects.
If the empty assembly also fails, inspect the tabs and tracks under bright light. A small amount of dried syrup can stop rotation, while a chipped tab can prevent secure engagement even after cleaning.
How to Fix a CREAMi Locking Problem Safely
The safest repair sequence moves from reversible cleaning and reseating to component replacement. Unplug the appliance before putting fingers near the spindle, paddle, locking tracks, or base receiver.
- Switch the machine off and unplug it. If a cycle was interrupted, wait for the moving parts to stop completely.
- Remove the outer bowl from the base if it releases normally. Do not twist against a hard stop.
- Separate the processing lid, paddle, outer bowl, and pint. Work on a counter with all parts visible.
- Inspect the frozen surface. Scrape away a hump and remove loose material above the fill boundary.
- Wash and dry the contact areas. Focus on the lid tabs, bowl track, paddle hub, gasket channel, and base receiver.
- Check the paddle. Replace it if the hub is cracked, the blade is bent, or the retainer cannot hold it.
- Seat the pint fully inside the outer bowl. Confirm that the pint bottom is not resting on ice, food residue, or a warped surface.
- Attach the processing lid without force. Align the marks or tabs specified for the model, then rotate through the normal path.
- Install the outer bowl into the base. Use the documented orientation and rotate the handle only as far as it moves smoothly.
- Run the machine only after every component is secure. If INSTALL remains active, unplug the appliance and repeat the assembly inspection once.
The empty-assembly test is the most useful diagnostic step. It prevents users from blaming the motor base when the actual obstruction is a pint that froze unevenly.
What Should You Clean and What Should You Not Disassemble?
Sticky residue on the lid, bowl track, or base receiver can create enough friction to stop the locking movement. Clean removable components with the method specified in the model manual, dry them completely, and keep liquid away from the motor base and electrical openings.
| Area | Safe routine check | Avoid | Typical frequency |
|---|---|---|---|
| Processing lid | Warm water, soft brush, full drying | Sharp picks in gasket channel | After each use |
| Paddle hub | Rinse and inspect retaining area | Running a loose paddle | After each use |
| Outer bowl track | Wipe residue from grooves | Abrasive scouring pads | Weekly during regular use |
| Motor spindle | Unplugged damp-cloth wipe | Pouring water into the base | As needed |
| Gasket channel | Remove residue and reseat seal | Stretching or twisting seal | After sticky recipes |
| Pint exterior | Wash and dry before storage | Freezing a cracked container | Every use |
A warm, damp cloth can remove residue from the exposed spindle, but the base should not be submerged or rinsed under a tap. Do not insert a knife, screwdriver, or metal pick into a safety opening. Those tools can damage the switch or leave conductive debris behind.
Ninja’s cleaning instructions vary by model and component. Dishwasher claims also vary. Use the owner’s guide for the exact machine, and avoid assuming that a part safe on the top rack is safe on the bottom rack.
Frozen Pint Problems That Mimic a Broken Lid
A frozen pint can mimic a mechanical failure because the paddle and lid cannot occupy the intended space. Freezing time alone does not guarantee a usable base; the surface must also be level, firm, and within the container’s fill boundary.
Freeze the pint on a level surface
Place the pint upright on a flat freezer shelf. A tilted position can produce a sloping frozen block, which may bring one side into contact with the paddle before the lid is fully seated.
A standard preparation window is approximately 24 hours for a fully solid base, although freezer temperature, recipe composition, container size, and model instructions affect the result. A pint that is soft in the center can process differently from one frozen hard throughout, so follow the recipe and manual rather than treating 24 hours as a universal guarantee.
When should you thaw the pint?
Thaw only enough to remove a jammed or expanded container safely. For a stuck assembly, unplug the unit and allow roughly 10-30 minutes at room temperature, checking progress periodically. Do not use boiling water, a heat gun, or a knife to pry frozen parts apart.
Thawing a pint for texture is separate from releasing a mechanically locked bowl. If the machine stopped during processing, wait until all movement ends, unplug it, and let the contents soften before attempting removal. Never defeat the lock by holding down a switch.
What if the pint is damaged?
Replace a cracked, split, or badly warped pint. A damaged container can leak into areas that are difficult to clean and may no longer center correctly in the outer bowl.
Typical replacement prices vary by model and seller:
| Replacement item | Typical USD price | Common reason | Compatibility check |
|---|---|---|---|
| Standard pint container | $15-$25 | Crack, staining, warping | Model and capacity |
| Processing paddle | $15-$30 | Bent blade or broken hub | Original, Deluxe, or Breeze type |
| Processing lid | $20-$40 | Broken tabs or retainer | Lid generation and bowl design |
| Outer bowl | $25-$50 | Damaged track or handle | Exact base and bowl system |
| Multi-part bundle | $40-$80 | Several worn components | Manufacturer part number |
These are typical retail ranges, not guaranteed Ninja prices. A warranty claim may cost less than buying parts, especially when the base or interlock continues to reject clean, correctly assembled bowls.
Why the Safety Interlock Refuses to Run
The safety interlock prevents operation unless the machine detects the required relationship among the base, outer bowl, processing lid, and paddle. The interlock is a safety feature, but the user-visible cause may be mechanical misalignment rather than an electronic defect.
Some summaries describe a universal infrared sensor and a precise 1 millimeter rejection tolerance. That level of technical detail should not be treated as a general CREAMi specification unless Ninja publishes it for the particular model. The practical rule is simpler: the machine must reach the prescribed lock position, and no part should be forced to get there.
Power reset procedure
A reset can clear a temporary control state, but it cannot repair a cracked tab or a pint that is too tall. Use this sequence:
| Reset step | Duration | Purpose |
|---|---|---|
| Switch off | 5 seconds | Stop the selected program |
| Unplug | 5 minutes | Remove electrical power |
| Inspect and clean | 3-10 minutes | Correct physical causes |
| Reassemble empty or with a flat pint | 1-3 minutes | Confirm seating |
| Reconnect power | 10 seconds | Restore normal operation |
| Start only when locked | Immediate | Prevent another interrupted cycle |
Powering the machine on before locking the bowl is not a dependable universal requirement. Follow the sequence in the model’s manual. A reset is useful after an interruption, but repeatedly cycling power while forcing the bowl can worsen a mechanical fault.
What Not to Force
Forcing the handle is the most expensive mistake in this troubleshooting process. Plastic tabs can appear intact while developing a hairline crack, and that crack may later prevent the interlock from recognizing a secure position.
Stop immediately when:
- The handle stops at the same point with an empty, clean assembly.
- The lid rocks instead of sitting flat.
- The paddle hub clicks loosely or falls out.
- A crack, whitening, chip, or distortion appears in the plastic.
- The bowl remains locked after unplugging and reasonable thawing.
- The motor base smells hot or makes an unusual electrical sound.
Expert insight: A lid that appears slightly off-center after the paddle is clipped in is not automatically defective. The paddle retainer and blade geometry can make the visible center look offset. Judge the part by secure retention, correct rotation, and the manual’s alignment marks, not by appearance alone.
Expert insight: The empty-bowl test has more diagnostic value than repeatedly retrying a full pint. A clean empty assembly removes frozen-food height, recipe expansion, and surface slope from the equation in under five minutes.
Expert insight: A failed lock after a sticky recipe often begins at the gasket or lid track, not inside the motor. Sugary residue dries into a thin ridge that changes how far the lid can rotate, even when the part looks clean from above.
When Is Replacement or Service Necessary?
Replacement is reasonable when one removable part has a visible failure and the base works with a known-good compatible assembly. Service is more appropriate when clean, undamaged parts repeatedly trigger INSTALL or the motor base has electrical symptoms.
| Finding after inspection | Likely decision | Typical cost exposure | Next action |
|---|---|---|---|
| Food residue only | Clean and reuse | $0-$5 | Wash, dry, retest |
| Hump or overfill only | Correct pint | $0 | Flatten or remake base |
| Broken paddle hub | Replace paddle | $15-$30 | Match model number |
| Cracked lid tab | Replace lid | $20-$40 | Stop processing |
| Damaged outer-bowl track | Replace bowl | $25-$50 | Verify bowl system |
| Clean assembly still shows INSTALL | Warranty or service | Varies | Contact Ninja support |
| Burning smell or base noise | Stop using machine | Varies | Disconnect and seek service |
Record the model number, purchase date, serial information, error light behavior, and a photograph of the suspected part before contacting Ninja. This evidence helps support staff distinguish a consumable accessory problem from a base-unit fault.
Do not open the motor base unless you are qualified to service mains-powered appliances and the warranty implications are understood. The visible lock problem does not justify exposing electrical components.
CREAMi Compared With Other Ice Cream Makers
The Ninja CREAMi differs from compressor and pre-freeze-bowl machines because it processes a solid frozen base with a driven paddle. That design supports small-batch texture control but creates more assembly and freezing constraints.
| Feature | Ninja CREAMi | Compressor machine | Pre-freeze-bowl machine |
|---|---|---|---|
| Base preparation | Usually about 24 hours frozen | Usually no pre-freeze | Commonly 12-24 hours |
| Processing style | Shaves and mixes frozen base | Churns liquid mix | Churns liquid mix |
| Locking complexity | Paddle, lid, bowl, base | Usually lid and paddle | Usually lid and paddle |
| Typical batch size | One pint or model-specific bowl | About 1-2 quarts | About 1-2 quarts |
| Main failure mode | Assembly or interlock rejection | Paddle stall or compressor issue | Warm bowl or drive slip |
| Texture adjustment | Re-spin and mix-ins | Churn time and recipe | Churn time and recipe |
A compressor machine is more convenient for immediate preparation, while a CREAMi uses less counter space and handles single-pint experimentation well. Neither design eliminates cleaning, recipe, or component-wear problems.
The CREAMi is not a good choice when you need a large quantity immediately or cannot reserve freezer space for upright containers. Its strength is controlled small-batch processing, not instant production.
Frequently Asked Questions About ninja creami lid won’t lock
Why is my Ninja CREAMi paddle falling out?
A paddle falls out when it is not fully clipped into the processing lid, the retaining hub contains residue, or the hub is cracked or worn. Clean and dry the hub, insert the paddle straight, and test retention with the lid inverted. Replace the paddle or lid if it still does not remain secured.
Can I use a different CREAMi pint or paddle?
Do not assume that CREAMi parts are interchangeable across original, Deluxe, Breeze, and newer models. Bowl capacity, paddle shape, lid geometry, and locking tracks can differ. Read the part number in the manual or on Ninja’s official support page before ordering or using a component from another machine.
How do I remove a CREAMi bowl that is stuck?
Turn the machine off, unplug it, and wait for moving parts to stop. Allow the frozen contents to soften for roughly 10-30 minutes, then attempt the normal release direction without tools. If the bowl remains immovable or the plastic begins to crack, stop and contact Ninja support rather than prying it loose.
Is it safe to process a pint with a frozen bump?
A small frozen bump should be scraped flat before processing. A pint that has expanded substantially past the MAX FILL line, developed a large hard crown, or cracked during freezing should not be processed as assembled. Remake the base or remove excess material only when the container remains structurally sound.
Why does the INSTALL light stay on after cleaning?
The INSTALL light can remain active when the bowl, lid, paddle, or pint is still slightly mis-seated, when a locking track contains residue, or when a temporary interrupted-cycle state has not cleared. Unplug for about five minutes, reassemble carefully, and test with a clean, compatible setup.
Is a blinking INSTALL light proof that the motor is broken?
No. A blinking INSTALL indication is more often associated with the required assembly or interlock position than with a failed motor. Test clean, undamaged, compatible components first. Contact Ninja when the same indication persists with an empty or known-good assembly, especially if noise, heat, or a burning smell is present.
Conclusion
When a ninja creami lid won’t lock, start by identifying whether the failure is at the paddle, processing lid, outer bowl, or motor base. Flatten a frozen hump, stay below the MAX FILL line, clean the tracks and gasket, reseat every component, and use a five-minute unplugged reset after an interruption. Never force the handle. If clean, compatible parts still trigger INSTALL, document the fault and pursue Ninja support or a model-matched replacement.