

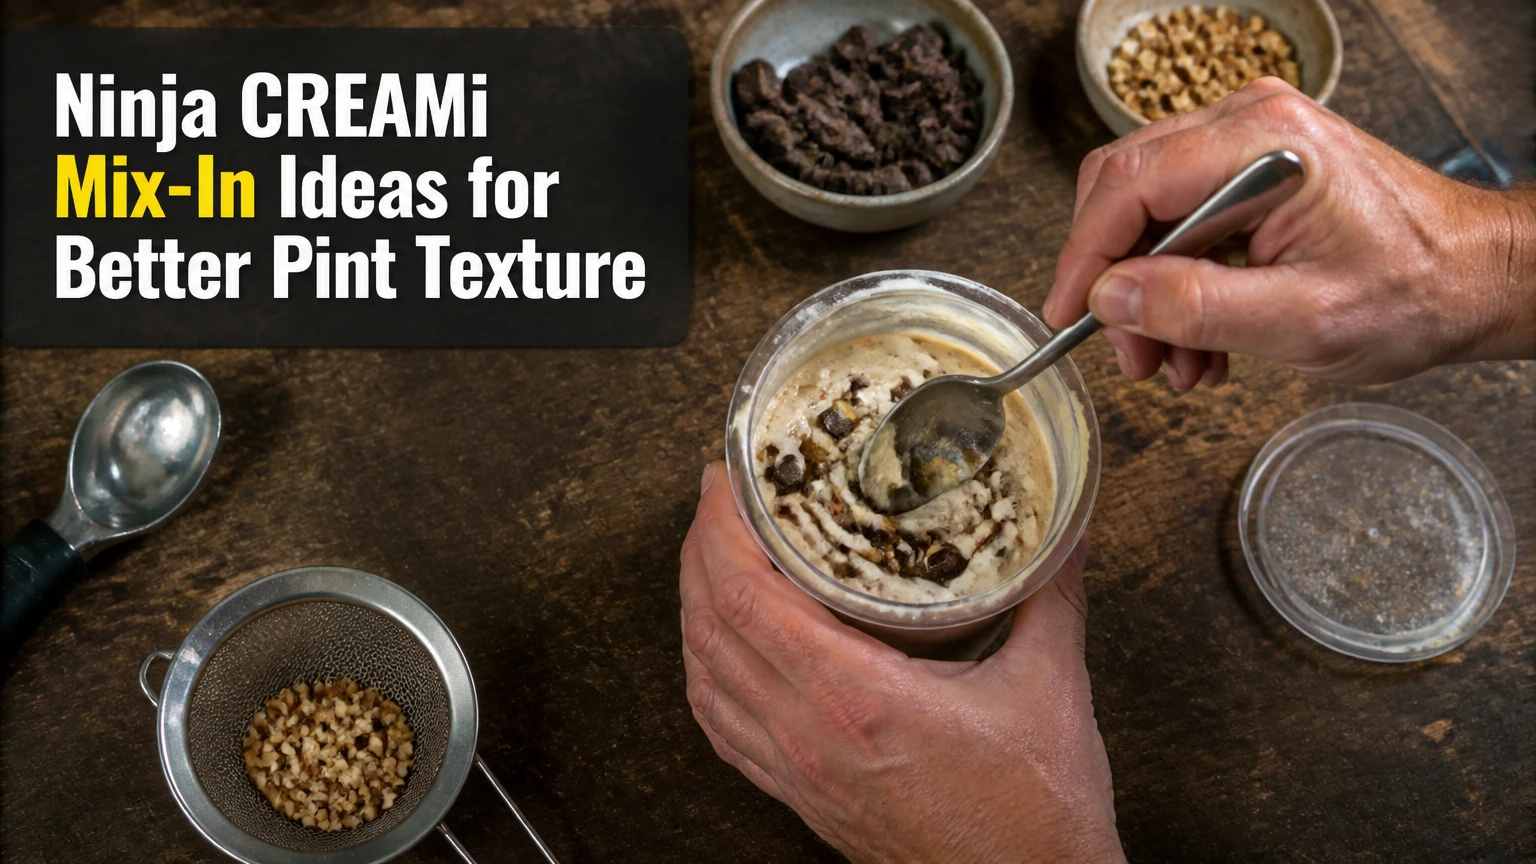
Ninja CREAMi mix in ideas are solid ingredients or sauces added after a frozen base has been processed smooth, then distributed with the machine’s gentler Mix-In cycle. The method preserves recognizable pieces better than blending them into the base, but success depends on particle size, moisture, temperature, and portion control.
Key Facts and Quick Answer
Freeze the prepared base level for at least 24 hours before processing.
Run Ice Cream, Lite Ice Cream, Sorbet, or the appropriate base cycle first.
Add mix-ins through a center hole about 1.5 inches wide and deep enough to reach the bottom.
Use pea-size pieces for nuts, candy, pretzels, and chocolate.
A typical starting amount is 1-2 tablespoons per standard pint.
Use Re-Spin for a powdery base, and Mix-In for folding in pieces without extra liquid.
What Is the Ninja CREAMi Mix-In Program?
The Ninja CREAMi Mix-In program is a short, lower-intensity cycle that distributes solid ingredients through an already processed frozen dessert. Unlike a conventional churner, the Ninja CREAMi usually processes the plain frozen base first, because pieces added before freezing can obstruct the paddle, sink, or become unevenly embedded in the block.
The program is designed for inclusion, not primary smoothing. Its paddle travels through the processed pint and folds ingredients into the soft base, so chocolate chips remain pieces, cookie crumbs retain some identity, and thick sauces create streaks when their viscosity is suitable.
The machine does not guarantee intact pieces. Large or very hard ingredients can still stress the paddle or remain poorly dispersed. The best results come from ingredients that are bite-sized, cold, and compatible with the softness of the processed base.
What the Mix-In cycle does not do
The Mix-In setting does not repair a dry, chalky, or heavily crumbly pint as reliably as Re-Spin. It also does not pulverize whole nuts, hard candy, or frozen fruit into a smooth puree. Those ingredients need preparation before they enter the container.
In practice, the first spin determines the foundation. The second cycle determines distribution.
How to Use Mix-Ins in a Ninja CREAMi
The correct sequence is freeze, process, assess, add, and mix. Preparing the center channel correctly matters because the paddle needs access to ingredients placed below the surface rather than only on top.
- Prepare the base. Pour the recipe into the appropriate CREAMi container without exceeding its Max Fill line. Leave space for expansion and later ingredients.
- Freeze level for at least 24 hours. Place the container on a flat freezer shelf at 0°F or colder when possible. An angled or partially frozen base can process unevenly.
- Run the primary program. Select the setting that matches the recipe, such as Ice Cream, Lite Ice Cream, Sorbet, or Milkshake where applicable.
- Inspect the texture. If the pint looks powdery or breaks into dry clumps, run Re-Spin before adding ingredients. A Mix-In cycle cannot substitute for a needed texture correction.
- Make the channel. Use the back of a spoon to form a hole roughly 1.5 inches wide, reaching close to the bottom without scraping aggressively against the container.
- Add prepared ingredients. Place the pieces into the channel. Spread very dense ingredients rather than dropping one heavy mass into the center.
- Run Mix-In once. The cycle commonly takes about 1.5-3 minutes, depending on model and program design.
- Serve or store. Eat immediately for the softest texture, or level the surface and refreeze promptly.
| Stage | Typical specification | Why it matters | Common error |
|---|---|---|---|
| Freezing | 24 hours minimum | Creates a stable frozen block | Freezing for only 8-12 hours |
| Center channel | About 1.5 inches wide | Lets the paddle reach the ingredients | Adding pieces only on top |
| Initial processing | One full base cycle | Smooths the frozen foundation | Starting with Mix-In |
| Mix-In cycle | About 1.5-3 minutes | Distributes pieces with less pulverizing | Repeating cycles unnecessarily |
| Starting quantity | 1-2 tablespoons | Limits overload and sinking | Filling the pint with additions |
Should ingredients be added before freezing?
Most solid mix-ins should not be added to the liquid base before the initial freeze. Heavy pieces often settle, fruit can freeze into hard inclusions, and hard candy or large nuts can create resistance when the paddle reaches them.
Exceptions exist for ingredients intended to dissolve or flavor the whole base, such as cocoa powder, smooth nut butter, finely blended fruit, and instant pudding powder. Those are base ingredients, not post-processing mix-ins.
Best Mix-In Ideas by Texture
The most reliable additions are chosen by texture rather than flavor alone. Soft baked pieces, pea-size crunchy ingredients, low-moisture fruit, and thick chilled sauces generally produce more predictable results than wet, oversized, or brittle additions.
- Crunchy: mini chocolate chips, toasted pecans, chopped almonds, pretzel pieces, granola, and crisp cereal.
- Soft and chewy: cookies, brownies, cake, edible cookie dough, marshmallows, and soft caramel pieces.
- Fruit-based: freeze-dried strawberries, diced mango, blueberries, raspberries, raisins, and finely chopped dates.
- Sauce or ribbon: peanut butter, pistachio cream, jam, lemon curd, dulce de leche, and chocolate hazelnut spread.
- Breakfast and protein: granola, cereal, chopped protein bars, roasted seeds, and powdered peanut butter clusters.
| Ingredient type | Preparation | Starting amount | Best pairing | Main risk |
|---|---|---|---|---|
| Mini chocolate chips | Chill before use | 1-2 tbsp | Vanilla, coffee, mint | Melting into streaks |
| Cookie pieces | Break into 0.25-0.5 inch pieces | 2 tbsp | Cheesecake, vanilla, chocolate | Becoming too soft |
| Toasted nuts | Cool and chop pea-size | 1 tbsp | Maple, banana, caramel | Paddle resistance |
| Freeze-dried fruit | Crush large pieces lightly | 1-2 tbsp | Strawberry, yogurt, coconut | Absorbing moisture |
| Fresh fruit | Dice to 0.25 inch and drain | 1 tbsp | Strawberry, peach, lemon | Ice pebbles and water |
| Thick nut butter | Chill or freeze as small chips | 1 tbsp | Chocolate, banana, coffee | Forming one dense lump |
| Cereal | Add immediately before mixing | 1-2 tbsp | Vanilla, cinnamon, malt | Losing crunch quickly |
Crunchy additions
Chocolate chips, toasted nuts, pretzels, hard cookies, and cereal offer the clearest contrast against a smooth base. Chop hard ingredients to approximately pea size, or roughly 0.25-0.5 inch, because the CREAMi is not intended to safely reduce whole almonds or large candy pieces.
Chilling chocolate is a practical texture control. Room-temperature chips can soften during processing and leave chocolate streaks, while refrigerated chips are more likely to remain discrete pieces.
Toasting nuts improves flavor and reduces raw moisture, but nuts must cool completely before entering the pint. Warm nuts soften the surrounding ice cream and can create an uneven pocket.
Soft, chewy, and baked pieces
Oreos, Biscoff cookies, brownies, cake, marshmallows, and edible cookie dough are forgiving because they do not offer the paddle the same resistance as hard candy. Cut brownies and cake into small cubes rather than pulverizing them, since the Mix-In cycle already breaks them down further.
Use only safe-to-eat cookie dough. Raw flour and uncooked eggs can carry foodborne pathogens, so a mix-in labeled or prepared for raw consumption is the appropriate choice.
Soft caramel may disappear into a warm or very soft base. Freeze small caramel pieces first, or use a thick caramel sauce in narrow frozen chips when a visible ribbon is preferred.
Fruit and moisture-heavy additions
Fresh fruit requires more preparation than freeze-dried fruit. Dice it finely, drain excess juice, and pat the pieces dry before adding them. Large watery pieces can freeze into hard fragments, commonly described by users as ice pebbles.
Freeze-dried strawberries and raspberries produce stronger flavor with less free water. Dried cherries, raisins, dates, and chopped apricots stay recognizable, although their concentrated sweetness can dominate a lightly sweetened base.
Frozen fruit can work when it is already small and partially thawed, but large frozen chunks are a poor choice. The paddle cannot reliably turn them into a smooth sauce during the gentle cycle.
Swirls and frozen sauce chips
Thick peanut butter, jam, lemon curd, dulce de leche, and chocolate spread can be added directly, but direct addition often produces a blended flavor rather than distinct ribbons. For cleaner layers, spread the sauce thinly on parchment, freeze it until firm, break it into fragments, and add those fragments through the center channel.
| Swirl method | Preparation time | Visual result | Best sauce consistency | Limitation |
|---|---|---|---|---|
| Direct spoonful | 1 minute | Mostly blended | Thick and cold | Fewer visible ribbons |
| Frozen sauce sheet | 20-40 minutes | Distinct streaks | Medium to thick | Requires freezer space |
| Sauce chips | 30-60 minutes | Dispersed pockets | Thick | Can create dense bites |
| Layered serving | 2-3 minutes | Strongest separation | Any thick sauce | Not evenly distributed |
Flavor Combinations That Work Reliably
The strongest combinations balance a smooth base, a contrasting texture, and one dominant accent. A neutral vanilla base can carry cookies, fruit, cereal, or nuts, while coffee and chocolate bases need sharper or saltier additions to prevent a flat result.
| Base flavor | Mix-in combination | Texture contrast | Typical ingredient cost per pint | Serving profile |
|---|---|---|---|---|
| Vanilla | Biscoff, cinnamon cereal, caramel | Crisp and chewy | $0.75-$1.75 | Spiced cookie |
| Chocolate | Peanut butter chips, pretzel, brownie | Crunchy and soft | $1.25-$2.50 | Salty chocolate |
| Strawberry | Freeze-dried berry, cheesecake pieces | Crisp and crumbly | $1.50-$3.00 | Berry dessert |
| Banana | Walnuts, chocolate chips, graham pieces | Crunchy and sandy | $1.00-$2.25 | Banana split |
| Coffee | Toffee, dark chocolate, hazelnut | Crisp and firm | $1.50-$3.25 | Mocha crunch |
| Coconut | Mango, toasted coconut, macadamia | Chewy and crunchy | $1.75-$3.50 | Tropical fruit |
| Plain protein | Peanut butter, cereal, cacao nibs | Dense and crisp | $1.25-$3.00 | High-protein crunch |
A practical formula is one soft component plus one crisp component. For example, brownie and pretzel create more contrast than brownie and cookie, both of which soften quickly.
Salt also matters. A small amount of pretzel, salted nut, or flaky salt can sharpen a sweet base without requiring more sugar. Add salt as a seasoning, not as a bulky mix-in.
How Much Mix-In Should You Add?
A typical starting quantity is 1-2 tablespoons per standard pint, although dense nuts and candy should begin closer to 1 tablespoon. Large amounts reduce the available ice cream volume, increase resistance, and make sinking more likely when the base is soft.
The ideal amount depends on particle density and moisture. Two tablespoons of crushed cereal occupy more space than two tablespoons of compact nut butter, while fresh fruit contributes water that changes the frozen texture as well as the volume.
| Mix-in | Conservative start | Upper practical range | Portion reason |
|---|---|---|---|
| Hard candy | 1 tbsp | 1.5 tbsp | High paddle resistance |
| Nuts | 1 tbsp | 2 tbsp | Dense and heavy |
| Cookie crumbs | 1 tbsp | 3 tbsp | Low mechanical resistance |
| Mini chocolate chips | 1 tbsp | 2 tbsp | Melting and sweetness |
| Dried fruit | 1 tbsp | 2 tbsp | Concentrated sugar |
| Fresh fruit | 1 tbsp | 2 tbsp | Water and softening |
| Thick sauce chips | 1 tbsp | 2 tbsp | Dense pockets |
Deluxe containers hold more volume than standard pint containers, but the correct quantity should still be scaled by the container’s fill level and the recipe’s texture. The machine model does not make oversized hard pieces safe.
Mix-In Versus Re-Spin: Which Cycle Should You Choose?
Mix-In folds ingredients into a smooth base, while Re-Spin processes the frozen dessert again to correct a powdery or crumbly texture. Re-Spin commonly benefits from 1-2 tablespoons of liquid when the recipe is dry, whereas Mix-In normally needs no added liquid.
| Feature | Re-Spin | Mix-In | Best decision |
|---|---|---|---|
| Primary purpose | Repair texture | Distribute pieces | Match the visible problem |
| Base condition | Powdery or crumbly | Already smooth | Assess before adding food |
| Added liquid | Often 1-2 tbsp | Usually none | Avoid liquid for crunchy pieces |
| Mechanical action | More aggressive smoothing | Gentler folding | Protect ingredient identity |
| Result | Softer, more aerated texture | Chunkier, thicker texture | Choose by serving preference |
| Failure if misused | Watery or overly soft pint | Uneven pieces in dry base | Use cycles in sequence |
A useful practitioner rule is simple: texture first, inclusions second. If the base needs Re-Spin, complete that correction before adding cookies, fruit, or candy.
Some users press Mix-In on a nearly smooth pint to create a slightly softer texture without adding liquid. That approach is model- and recipe-dependent, and it is not a substitute for fixing a genuinely powdery base.
How Do Dietary and Situational Variants Change the Method?
Protein, dairy-free, low-sugar, and fruit-heavy recipes need different mix-in choices because their bases often freeze harder or contain more water. The post-processing technique remains the same, but the ingredients should match the base’s structural weakness.
Protein pints
Protein powders can create a dry or chalky base, especially when the recipe contains little fat or sugar. Run the appropriate initial cycle, evaluate the powderiness, and use Re-Spin before adding protein bar pieces, cereal, cacao nibs, or peanut butter chips.
A small amount of pudding mix or a tested stabilizer can improve body, but stabilizers should be measured carefully. A typical starting point for xanthan gum is about 1/4 teaspoon per pint, while instant pudding mix often starts around 1 tablespoon. Too much can create gumminess.
Dairy-free pints
Coconut milk, oat milk, cashew milk, and soy-based bases can soften differently after processing. Coconut-based recipes pair well with toasted coconut, mango, or macadamia, while oat-based recipes support cinnamon cereal and cookie pieces.
Dairy-free bases do not automatically suspend heavy inclusions better. If the pint becomes very soft, refreeze it for 5-10 minutes before adding dense pieces, provided the surface remains workable.
Low-sugar and fruit-heavy pints
Low-sugar bases often freeze harder because sugar lowers the freezing point. A hard block can process unevenly if the recipe is not designed for the machine, so follow the appliance and recipe guidance rather than compensating with excessive liquid.
Fruit-heavy bases contain more water. Prefer freeze-dried fruit, small drained pieces, or fruit swirls made from a reduced puree. Large fresh berries are among the least predictable additions.
What Mistakes Cause Poor Results?
The most common failures come from treating the Mix-In cycle as a blender or from ignoring the condition of the base. Properly sized ingredients cannot compensate for an overfilled container, an angled freeze, or a pint that needed Re-Spin first.
| Symptom | Likely cause | Correction | Prevention |
|---|---|---|---|
| Pieces collect at bottom | Base is too soft or pieces are dense | Chill 5-10 minutes and use less | Drain fruit and reduce quantity |
| Chocolate disappears | Chips were warm or base was soft | Chill chips and refreeze briefly | Add cold ingredients |
| Paddle stalls | Whole nuts or hard candy | Stop and remove oversized pieces | Chop to pea size |
| Pint remains powdery | Mix-In used before texture correction | Run Re-Spin first | Inspect after the initial cycle |
| Texture becomes icy | Watery fruit or excess liquid | Serve sooner and reduce wet additions | Use dried or reduced fruit |
| Pieces remain on top | Center channel was too shallow | Reopen the channel carefully | Reach near the bottom |
| Container overflows | Base was filled to Max Fill line | Remove some material before processing | Leave headroom |
Safety boundaries
Do not add large whole nuts, jawbreaker-style candy, ice cubes, or other exceptionally hard pieces. The paddle is designed to process frozen dessert, not to crush arbitrary solids.
Stop the machine if unusual resistance, loud knocking, or container movement occurs. Never force the outer bowl, paddle, or container into position, and consult the manual for the specific CREAMi model when a warning or error appears.
Storage, Leftovers, and Texture Recovery
A Mix-In pint is usually best immediately after processing, because cookies soften, cereal loses crunch, and fresh fruit releases water over time. If leftovers are stored, level the surface, seal the container, and return it to the freezer promptly.
After refreezing, the dessert may become firmer and less scoopable. Let it sit briefly at room temperature, then use the machine’s approved reprocessing option if the model and container instructions permit it. Do not repeatedly process a pint containing hard pieces, since every additional cycle reduces texture contrast and increases mechanical stress.
Sauce ribbons may migrate during storage. Frozen sauce chips hold separation better than liquid spoonfuls, while freeze-dried fruit remains more distinct than fresh fruit after a second freeze.
Frequently Asked Questions About ninja creami mix in ideas
Can I put candy bars into a Ninja CREAMi pint?
Yes, if the candy is cut into small, soft or moderately firm pieces and added after the base is processed. Avoid whole bars, large caramel blocks, and exceptionally hard candy. Start with about 1 tablespoon, because dense candy can increase paddle resistance and make the pint overly sweet.
Why are my mix-ins sinking?
Mix-ins sink when the processed base is very soft, the ingredients are heavy, or the pieces contain surface moisture. Chill the pint for 5-10 minutes, drain fresh fruit, and reduce dense additions to about 1 tablespoon. Frozen sauce chips and smaller pieces distribute more evenly.
Can I use frozen cookie dough?
Use only edible cookie dough prepared for consumption without baking. Cut it into small pieces and keep it cold until the Mix-In cycle begins. Standard raw dough may contain untreated flour or uncooked eggs, which can create food-safety risks even when the dessert remains frozen.
Should I use fresh or freeze-dried fruit?
Freeze-dried fruit usually gives more consistent texture because it contributes less free water and stays lightweight. Fresh fruit offers a juicier flavor but should be diced small, drained, and used in modest quantities to reduce icy fragments and post-freeze softening.
How can I keep cereal crunchy?
Add cereal immediately before serving and use a sturdy variety such as granola clusters or toasted corn cereal. The moisture in the ice cream softens cereal quickly, so a layered topping often preserves crunch longer than processing all of it through the pint.
Can I refreeze a pint after adding mix-ins?
Yes, but the texture will usually become firmer and some additions will soften. Seal the container, freeze it promptly, and allow a short tempering period before serving. Fresh fruit and cereal change the most during storage, while nuts and chocolate generally retain their identity better.
Final Recommendation
The best ninja creami mix in ideas follow a controlled sequence: freeze the base for 24 hours, process it smooth, correct texture with Re-Spin when necessary, add 1-2 tablespoons of prepared ingredients, and run Mix-In once. Choose pea-size hard pieces, chilled chocolate, drained fruit, and frozen sauce chips when texture separation matters.