
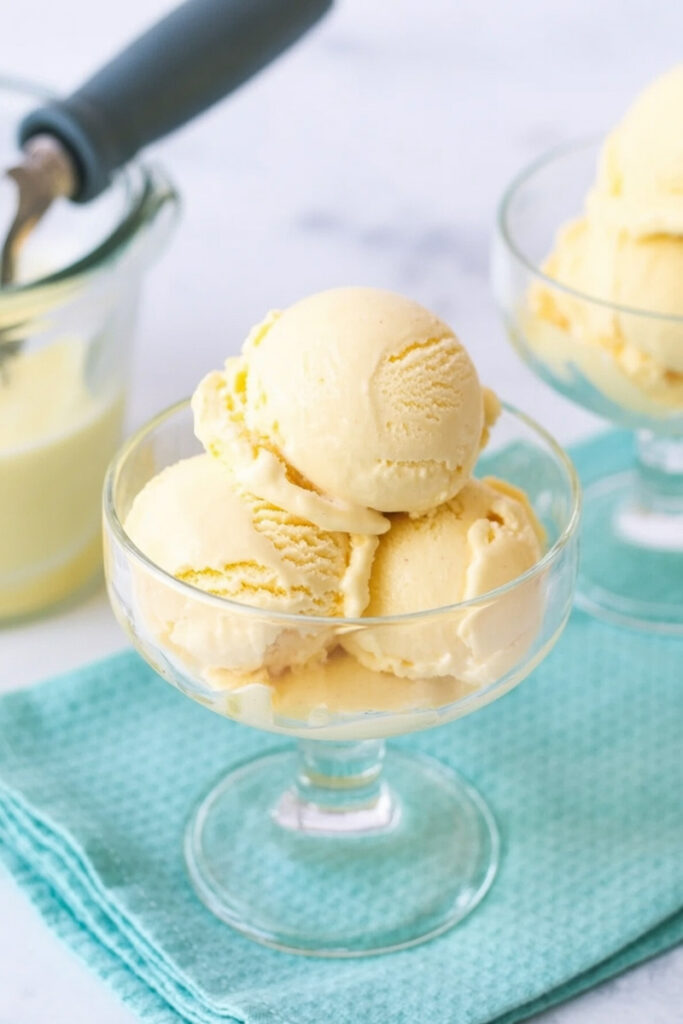
Hey there! Welcome to my kitchen. I want to share a recipe that I’m genuinely excited about. It’s a little trick I discovered that turns a few basic ingredients into the creamiest vanilla ice cream you’ve ever had.
I’m talking about a dessert that tastes like pure childhood.
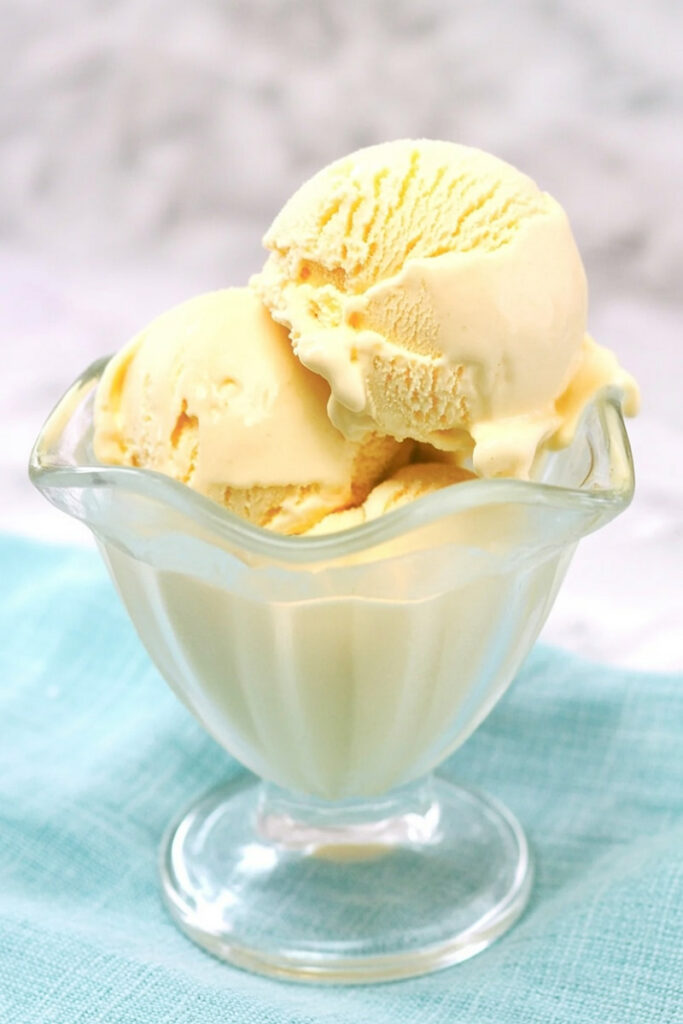
We all love vanilla ice cream. It’s perfect by itself, and it’s even better with a slice of warm apple pie or a gooey brownie. But let’s be real. Making ice cream from scratch can be a huge pain. All that cooking custard, messing with eggs, and waiting around. Who has time for that?
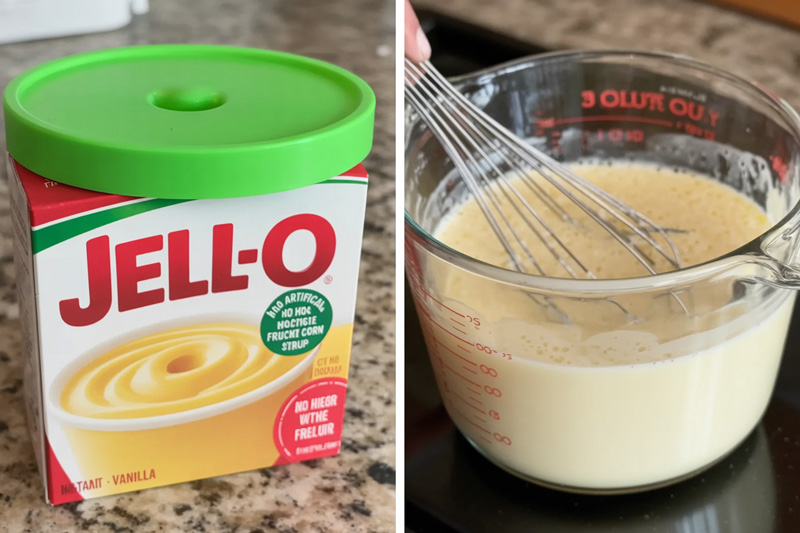
This is where your Ninja Creami and a secret weapon from the pantry come in: instant vanilla pudding mix.
Seriously, the pudding mix is the key. It keeps the ice cream from getting icy and gives it an amazing, smooth texture without any of the hard work. I stumbled upon this method when I was craving ice cream late one night and didn’t want to make a whole production of it. I figured, why not try it? The result was so good, it’s now my go-to method.
It’s the classic flavor you love, just made incredibly simple. So, let’s make the best vanilla ice cream you’ve ever tasted, right at home.
What to Expect: Your Plan for Success
Before we jump in, let’s quickly go over the game plan. This recipe is so straightforward. The machine really does all the work for you.
Prep Time: You only need about 5 minutes to mix everything together. That’s it! The hardest part is waiting for it to freeze, which takes a full 24 hours. Trust me, this wait is essential for the Creami to do its thing.
Servings: This makes one Ninja Creami pint, which is perfect for 2-3 people. Want to stock up? You can easily make a few pints at once so they’re ready to go whenever you are.
Here’s a handy chart for making bigger batches:
| Pints to Make | Instant Pudding Mix | Milk (Whole) | Heavy Cream | Vanilla Extract |
| 1 Pint | 4 tbsp | 1 ½ cups | ½ cup | 1 tsp |
| 2 Pints | ½ cup (8 tbsp) | 3 cups | 1 cup | 2 tsp |
| 3 Pints | ¾ cup (12 tbsp) | 4 ½ cups | 1 ½ cups | 1 tbsp (3 tsp) |
| 4 Pints | 1 cup (16 tbsp) | 6 cups | 2 cups | 4 tsp |
Difficulty Level: I’d say this is a 1 out of 5. If you can use a whisk, you can make this ice cream. It’s the perfect first recipe to try if you’re new to the Ninja Creami.
Equipment You’ll Need:
- Ninja Creami Machine (of course!)
- Ninja Creami Pint Container
- A mixing bowl
- A whisk (a fork works too, just mix really well!)
Make-Ahead Friendly?: Absolutely! This recipe is perfect for making ahead. You can mix up several bases and keep them in the freezer for up to a month. Fresh ice cream in minutes? Yes, please.
The Magic Ingredients: What You’ll Need
Great ice cream starts with simple, good ingredients. Here’s what’s in this recipe and why it works.
Instant Vanilla Pudding Mix (4 tablespoons): This is our shortcut to an incredibly creamy texture. The pudding mix stops big ice crystals from forming, so your ice cream is smooth and dense, not slushy. Any brand works fine.
Whole Milk (1 ½ cups): I really recommend using whole milk. The fat in it makes the ice cream richer and creamier. You can use 2% milk, but it won’t be quite as decadent. I’d skip the skim milk for this one, as it can make the final result a bit icy.
Heavy Cream (½ cup): This is what gives the ice cream that luxurious, satisfying feeling. For that super-rich texture we all want, this is a must-have.
Pure Vanilla Extract (1 teaspoon): Good vanilla makes a huge difference! If you want to get a little fancy, you can scrape the seeds from half a vanilla bean. You’ll get those pretty black specks and an even deeper vanilla flavor.
The Step-by-Step Method: Let’s Make Ice Cream!
Alright, time for the fun part. I’ll walk you through every step.
Step 1: Make the Base
Grab your mixing bowl. Pour in the 1 ½ cups of milk and add the 4 tablespoons of instant vanilla pudding mix.
Start whisking! Keep going for about a minute or two until all the powder is completely gone. You don’t want any lumps. The mixture will get just a little bit thicker. That’s the pudding mix starting to work its magic.
Step 2: Add the Good Stuff
Now that your base is smooth, pour in the ½ cup of heavy cream and the 1 teaspoon of vanilla extract.
Gently stir everything together. You’re not trying to whip it, just mix it until it’s all one lovely, pale cream color. It should smell amazing right about now.
Step 3: The Big Chill
Carefully pour the mixture into your Ninja Creami pint. Important: Do not fill it past the “Max Fill” line! The base will expand a bit when it freezes.
Snap the lid on tight and stick it in the freezer. Make sure it’s sitting on a flat, level surface. If it freezes crooked, it can mess with the Creami’s blade. Now for the hard part… wait a full 24 hours. This is non-negotiable! It needs to be frozen solid for the machine to work properly.
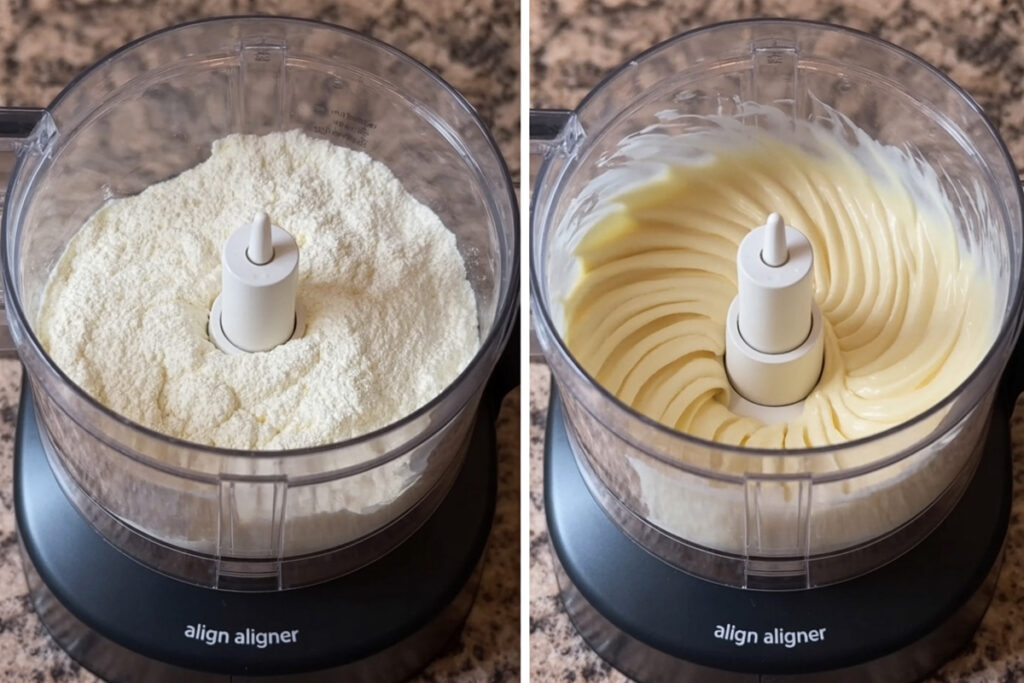
Step 4: The Creami Transformation
It’s time! Take the pint out of the freezer and remove the lid. It will look like a solid block of ice. That’s perfect.
Place the pint in the outer bowl, attach the blade lid, and lock it into your Ninja Creami. Press the “Ice Cream” button. The machine will make some noise for a couple of minutes while it shaves the frozen base into an impossibly creamy treat.
Step 5: Check the Texture
Once the cycle finishes, take the pint out and have a look. Sometimes, the ice cream looks a little powdery or crumbly after the first spin. Don’t worry! This is totally normal.
Just put it back in the machine and press the “Re-spin” button. This second spin almost always makes it perfectly smooth and creamy. If it’s still a bit crumbly (which is rare), just add one tablespoon of milk and hit “Re-spin” one last time.
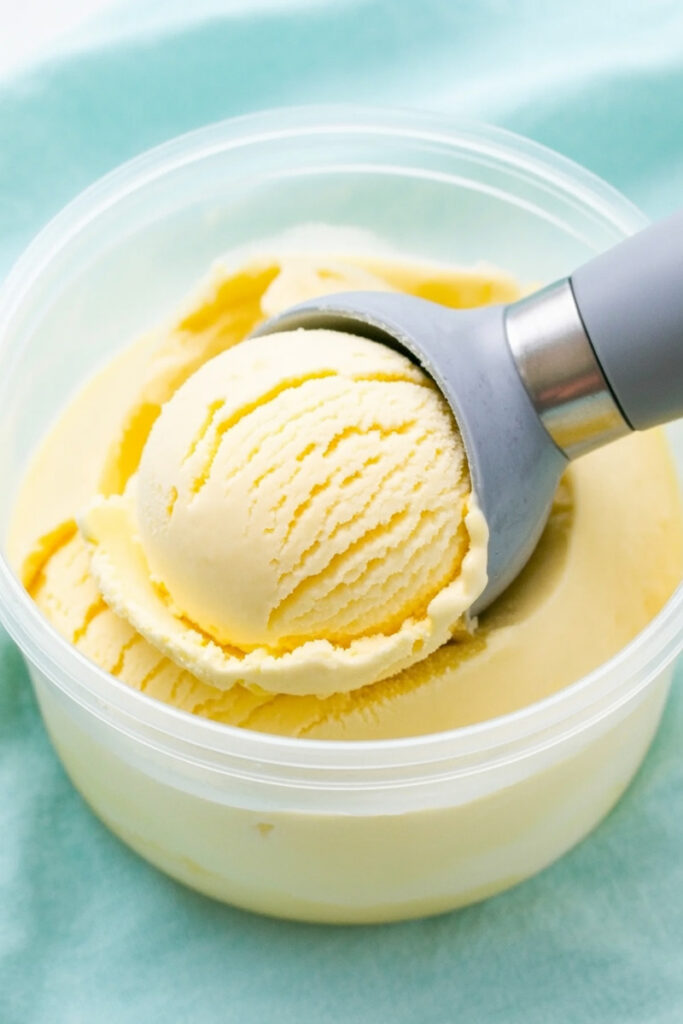
You should have thick, smooth, and perfectly scoopable ice cream.
Time to Get Creative: Make It Your Own!
This simple vanilla ice cream is the perfect blank slate. Here are a few ideas to get you started.
- For a dairy-free version: Swap the milk for a creamy oat or cashew milk and use full-fat canned coconut cream instead of heavy cream.
- For a sugar-free version: Just use a sugar-free instant vanilla pudding mix. Easy!
The Best Part: Mix-Ins!
After your ice cream is nice and creamy, dig a small hole in the center, add your favorite treats, and use the “Mix-in” function. Try these:
- Crushed Oreos or chocolate chip cookie chunks.
- Mini chocolate chips or brownie bits.
- A swirl of strawberry jam or fudge sauce.
- A dash of cinnamon or a pinch of sea salt in the base before freezing.
How to Serve and Store Your Masterpiece
You did it! Time to enjoy.
This ice cream is amazing on its own, but it’s also great in a cone or next to a warm dessert.
If you have leftovers (which is a big if), just smooth the top and pop the pint back in the freezer. When you want more, it will be frozen solid again. Don’t try to scoop it! Just put it back in the Ninja Creami and hit the “Re-spin” button. It will be perfectly creamy again in minutes. It’s one of the coolest things about this machine.
I hope you love making this simple and delicious ice cream. Happy churning!
PrintNinja Creami Vanilla Pudding Ice Cream

Tired of complicated ice cream recipes? This one uses a secret pantry staple—instant pudding mix—to create the creamiest, smoothest vanilla ice cream you’ll ever make in your Ninja Creami. It’s practically foolproof and tastes like a dream.
- Prep Time: 5 minutes
- Cook Time: None
- Total Time: 24 hours 5 minutes (includes freezing)
- Yield: 1 Pint (2-3 servings)
- Category: Dessert
- Cuisine: American
Ingredients
4 tbspInstant Vanilla Pudding Mix1 ½ cupsWhole Milk½ cupHeavy Cream1 tspPure Vanilla Extract
Instructions
- Mix the Base: In a mixing bowl, whisk the instant pudding mix and whole milk together for about 2 minutes until completely smooth. You want to make sure there are no lumps.
- Add Richness: Gently stir in the heavy cream and vanilla extract until everything is just combined.
- Freeze Solid: Pour the mixture into your Ninja Creami pint container. Be careful not to fill past the max line. Secure the lid and place the pint on a level surface in your freezer for a full 24 hours.
- First Spin: Once frozen solid, place the pint into the outer bowl, attach the blade, and lock it into your Creami. Press the “Ice Cream” button.
- Perfect the Texture: After the first spin, check the texture. If it looks a bit powdery or crumbly (this is common!), place it back in the machine and use the “Re-spin” button. This usually does the trick for a perfectly smooth consistency.
Notes
- Serving Suggestions: This vanilla ice cream is glorious on its own, but it’s also the perfect partner for warm brownies, apple pie, or a sundae bar with all your favorite toppings.
- Pro Tip: If your ice cream is still crumbly after a re-spin, add just 1 tablespoon of cold milk and re-spin one more time. It will bring everything together into a super creamy texture.
- Storage & Re-Spinning: Smooth the top of any leftover ice cream and refreeze it right in the pint. When you want another scoop, don’t try to dig it out! Simply pop it back into the machine and use the “Re-spin” function to return it to its original creamy glory.