
Hey, everyone! Ever dream of a tropical getaway but can’t leave your kitchen? I’ve got you. This Ninja Creami Piña Colada Ice Cream recipe is the answer.
It’s not just ice cream—it’s a mini-vacation in a pint. We’re taking the best of a piña colada—that sweet pineapple and rich coconut—and turning it into a velvety-smooth, scoopable masterpiece using the Ninja Creami.
My Journey to a Better Recipe
The piña colada cocktail might come from Puerto Rico, but this ice cream version captures its spirit in a whole new way. I created this recipe because I needed a simple, intensely flavorful dessert. A treat that could transport me to a sunny beach with just one spoonful.
Unlike regular ice cream, this method gives you an incredibly dense, creamy texture without any complex cooking or custards. It’s a pure, unadulterated taste of paradise, and it’s surprisingly easy to make.
Quick Look at the Recipe
This recipe is designed for maximum flavor with minimal effort. The secret is the Ninja Creami and a few quality ingredients.
- Prep Time: 5 minutes. Seriously, that’s it.
- Freeze Time: You’ll need a full 24 hours. The mixture has to be rock-solid. This is the key to that perfect, creamy texture.
- Servings: One generous pint. Perfect for a single serving or two smaller ones.
- Scaling: Easy. You can double or triple the recipe. Just make sure you use a separate Ninja Creami pint for each batch. Don’t fill past the MAX FILL line!
- Difficulty: I’d rate this as super easy. If you can measure and pour, you can nail this.
- Equipment: The star of the show is the Ninja Creami Ice Cream Maker. You’ll also want a measuring cup, a spoon, and maybe a small skillet if you’re toasting your coconut (which I highly recommend!).
- Meal Prep: This is the ultimate make-ahead dessert! You can prep the base and leave it in the freezer for up to a month before you’re ready to spin it.
The Ingredients: Simple but Important
The beauty of this recipe is its simplicity. Because there are so few ingredients, the quality of each one really shines.
| Ingredient | Amount | Notes |
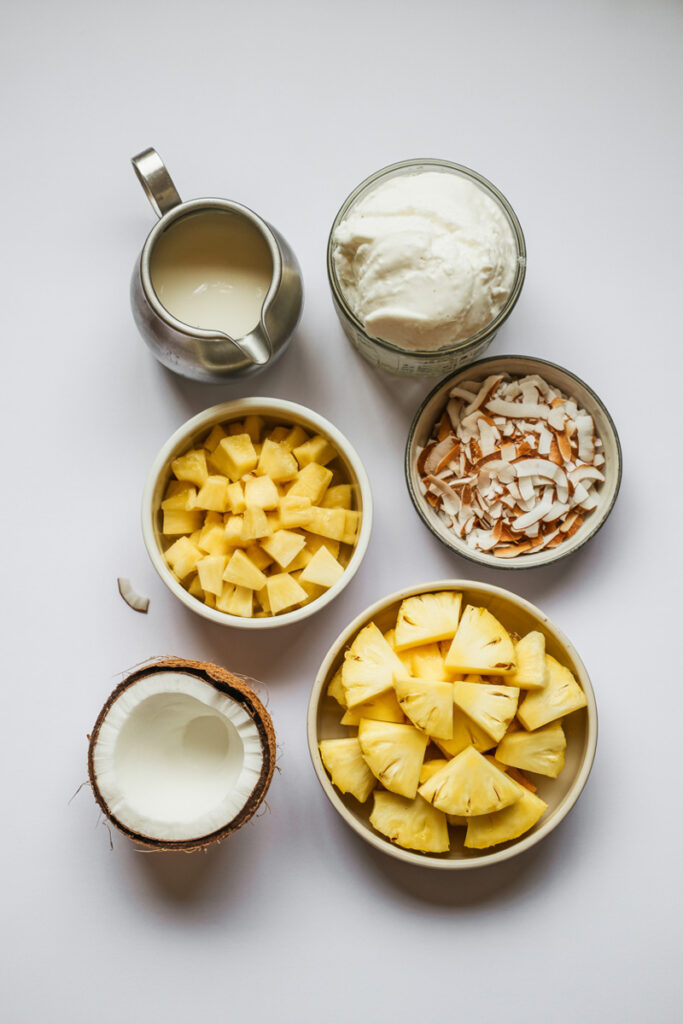
| Coconut Cream | 1 ¼ cups | This is the foundation of our creaminess. Use the canned, unsweetened kind, not the refrigerated coconut milk from a carton. I always chill my can overnight. |
| Pineapple Tidbits | ½ cup | Canned tidbits work best. They ensure a consistent level of sweetness and moisture. |
| Toasted Coconut | 1 tablespoon | Adds a fantastic nutty flavor and a lovely texture. Toasting it yourself makes a huge difference. |
| Chopped Pineapple | 1 tablespoon | This gives you juicy little bursts of tropical flavor. |
| Pineapple Juice | 1-2 tbsp | (Optional) A secret weapon! Use the juice reserved from the canned pineapple if your first spin is too dry. |
A quick tip on coconut cream: Chilling the can overnight in the fridge makes the solid cream separate from the liquid. This makes it super easy to measure exactly what you need.
And for the toasted coconut: You can use sweetened or unsweetened. I prefer unsweetened, so the natural pineapple flavor can be the star. Toasting is easy: just toss a tablespoon in a dry skillet over medium heat and stir constantly for about three minutes until it’s golden brown and smells amazing.
The Step-by-Step Method
This process is so straightforward, it feels like cheating.
Prepare the Base: Grab your Ninja Creami pint container. Pour in 1 ¼ cups of thick, luscious coconut cream. Then, add ½ cup of canned pineapple tidbits. That’s it! No need to stir yet—the machine will handle it all.
The Big Freeze: Secure the lid and put the pint in your freezer. This is critical. It has to freeze completely solid and level. This takes at least 24 hours. You’ll know it’s ready when it’s rock-solid all the way through, with no soft spots.
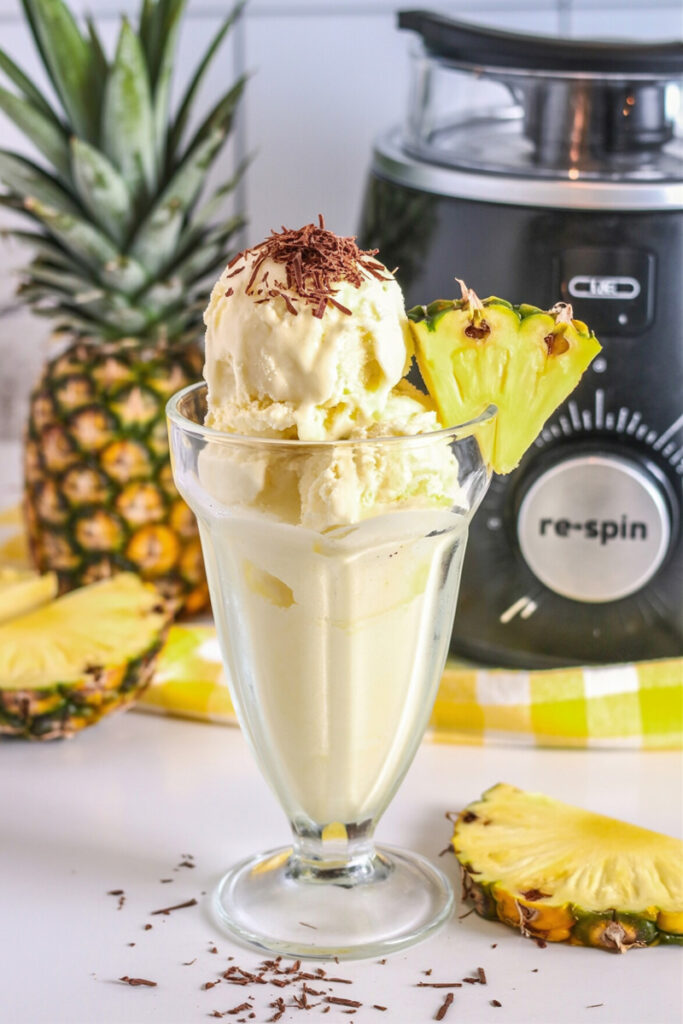
The First Spin: Once it’s frozen, it’s time for the magic! Place the pint in the Ninja Creami outer bowl and lock it in. Select the Lite Ice Cream button. Listen to the sound of the paddle going to work—that’s your cue that something delicious is about to happen!
Checking the Texture: After the first spin, take a look. Is it perfectly creamy and scoopable? Awesome! If not, don’t panic. It’s a common thing and easy to fix.
Looks like sand or is dry and crumbly? It needs more moisture. Add 1-2 tablespoons of the reserved pineapple juice.
Looks like tiny frozen balls? It just needs to be broken down more. Don’t add any liquid.
The Re-Spin: Whatever the issue, if the texture isn’t perfect, place the pint back in the machine and press the Re-Spin button. This extra pass will smooth it out. You might have to do it once or twice. You’ll know it’s perfect when the ice cream has a smooth, glossy look and scoops easily.
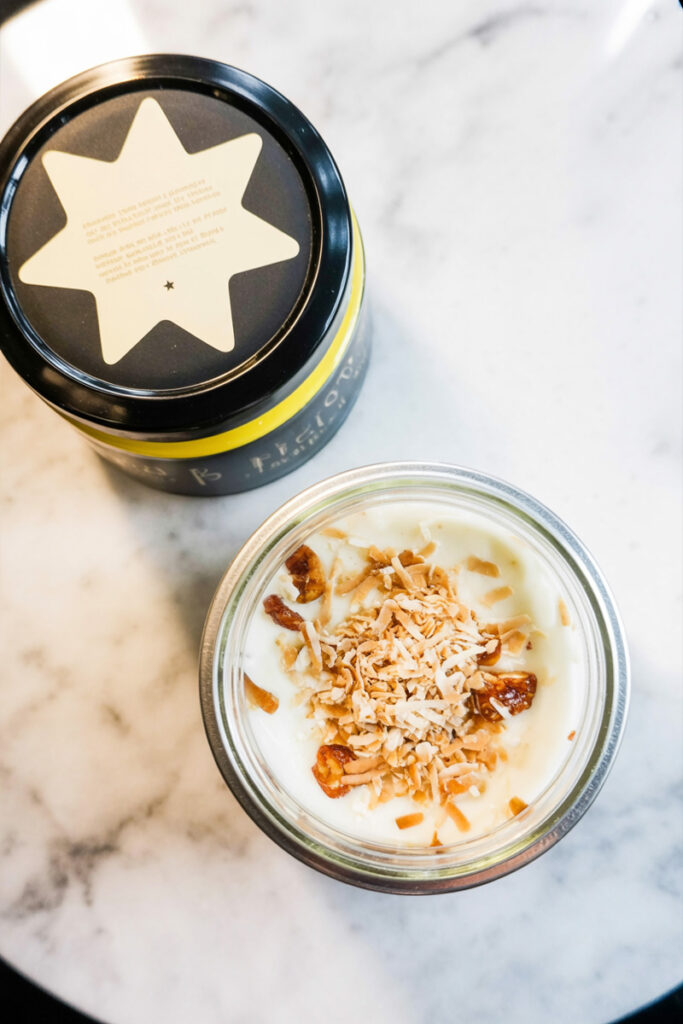
Add Your Mix-Ins: Now for the best part! Create a hole or “well” down the center of the pint with your spoon. Fill it with the toasted coconut and chopped pineapple. Lock the pint back in and select the MIX-IN function. This cycle distributes the goodies without pulverizing them.
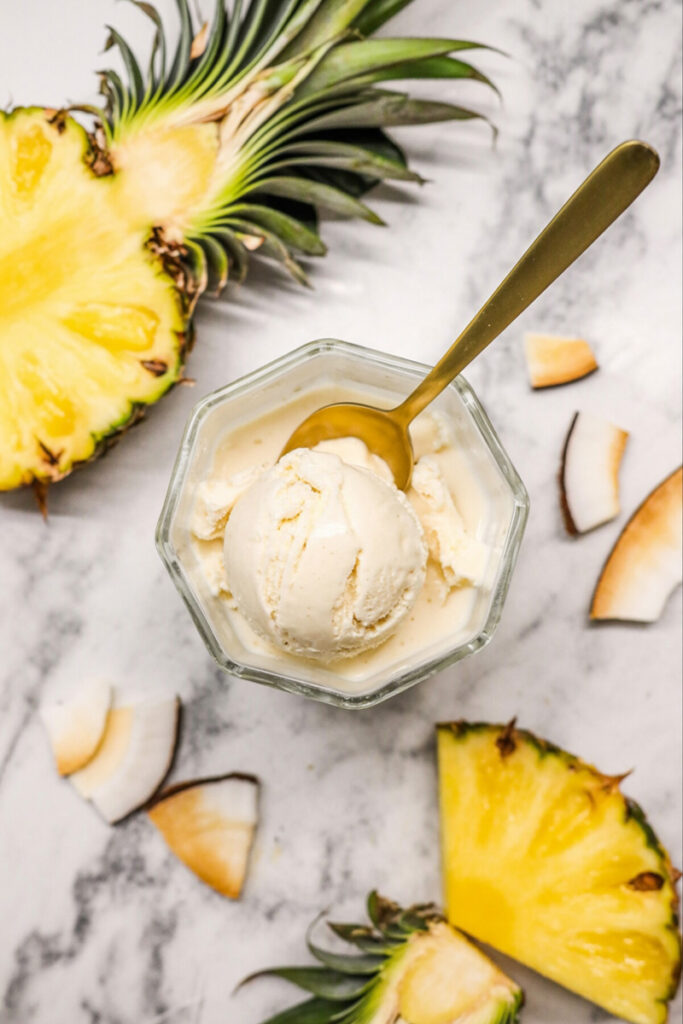
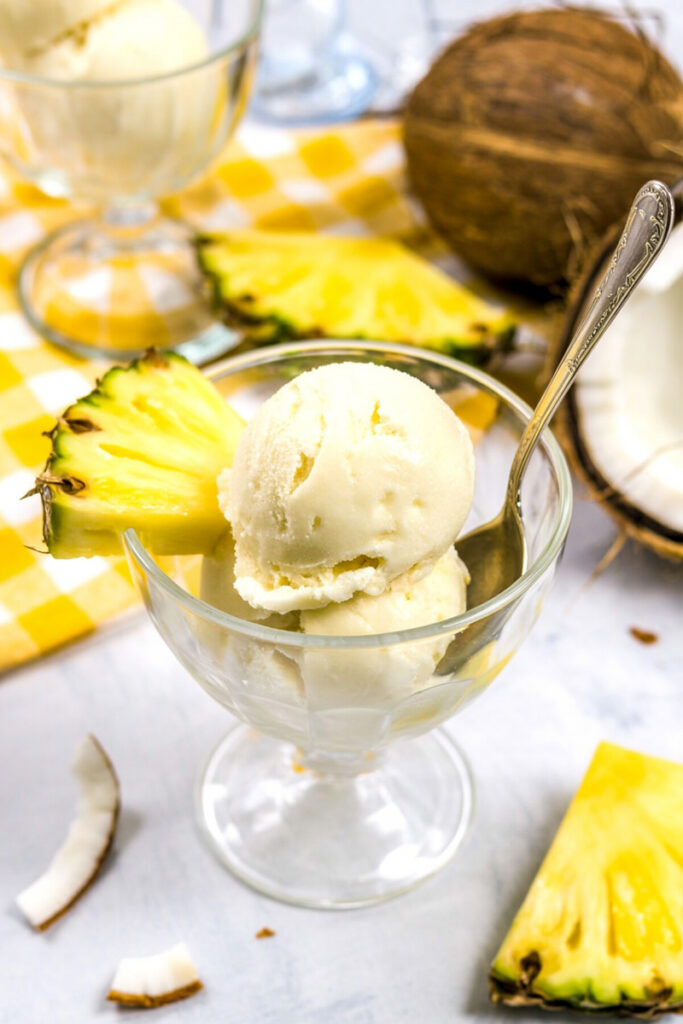
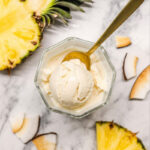
Enjoy! Once the final cycle is done, your homemade Piña Colada Ice Cream is ready. It should be perfectly smooth with little bursts of pineapple and crunchy bits of coconut. Eat it right away!
Mix It Up: Variations and Customizations
This is a great base recipe to get creative with!
- Dietary Tweaks: This recipe is already vegan and gluten-free. To make it high-protein, you can sub some of the coconut cream with a protein shake or protein powder mixed with water or milk.
- Flavor Adjustments:
- A Touch of Rum: For a classic experience, replace an ounce of coconut cream with an ounce of light rum. Just be careful—too much alcohol can keep the base from freezing properly.
- Extra Sweetness: If you want it sweeter, add a tablespoon or two of sugar or your favorite sweetener before freezing.
- A Citrus Kick: Squeeze in a little fresh lime juice for a brighter flavor.
- Serving Suggestions:
- Everyday: It’s great as-is for a simple treat.
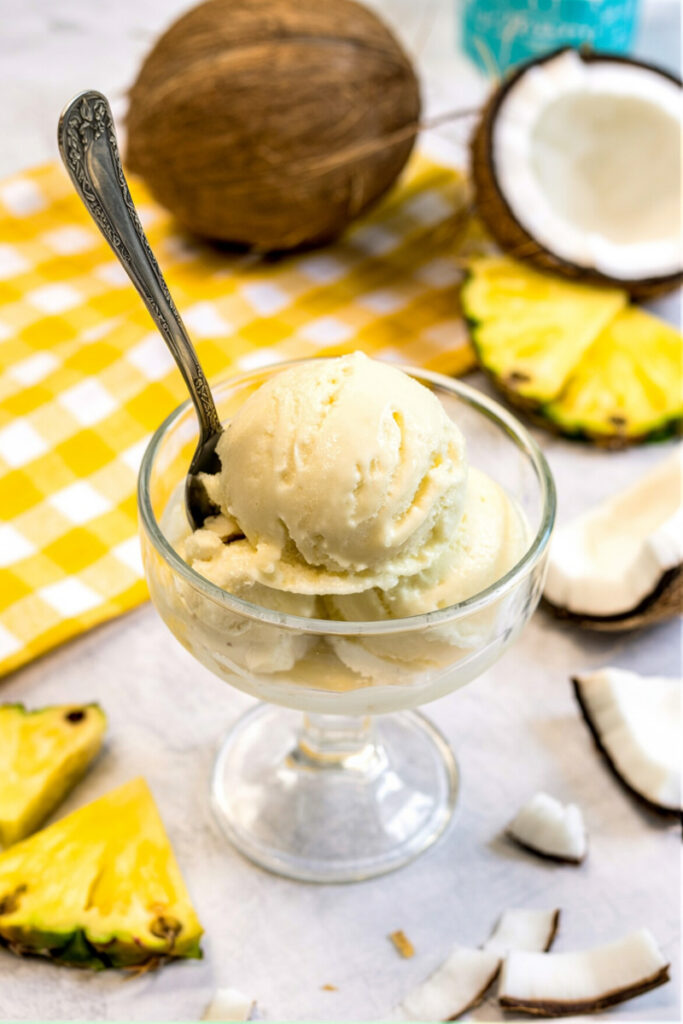
- Fancy: Serve it in a chilled glass with a maraschino cherry and a paper umbrella. You could even drizzle some dark rum on top. For a super fun look, scoop it into a hollowed-out pineapple half!
Storing Your Leftovers
Got leftovers? Lucky you!
- Storage: Store any leftover ice cream right in the Ninja Creami pint. Just flatten the top and put the lid back on. Store it in the freezer.
- The Next Day: Your ice cream will likely be rock-solid again. Do not microwave it. Just let it sit on the counter for a few minutes, then re-spin it in the Ninja Creami on the “Lite Ice Cream” setting. This brings back that perfect, creamy texture.
I hope you love this easy and delicious taste of the tropics. Happy spinning!
PrintNinja Creami Piña Colada Ice Cream
Get ready for a tropical escape in a single scoop! This Ninja Creami recipe transforms the classic piña colada into a rich, creamy, and ridiculously easy-to-make dessert. It’s like a mini-vacation in a pint—no plane ticket required.
- Prep Time: 5 minutes
- Cook Time: None
- Total Time: 24 hours, 5 minutes (includes 24-hour freeze time)
- Yield: 1 pint 1x
- Category: Dessert, Ice Cream
- Cuisine: American, Tropical
Ingredients
- 1 ¼ cups canned, unsweetened coconut cream (chilled overnight)
- ½ cup canned pineapple tidbits
- 1 tbsp toasted coconut (optional, but highly recommended)
- 1 tbsp chopped pineapple (optional)
- 1–2 tbsp reserved pineapple juice (optional, for texture)
Instructions
- Prep the Base: In your Ninja Creami pint, pour in the coconut cream and pineapple tidbits. There’s no need to stir. Just put the lid on.
- Freeze: Place the pint in the freezer, making sure it’s completely level. Freeze for at least 24 hours until rock-solid.
- First Spin: Place the frozen pint into the Ninja Creami outer bowl and lock it into the machine. Select the “Lite Ice Cream” function and let it work its magic.
- Re-Spin for Creaminess: After the first spin, check the texture. If it’s crumbly or dry, add 1-2 tablespoons of the reserved pineapple juice and hit “Re-Spin.” If it looks like frozen balls, just “Re-Spin” without adding any liquid.
- Add Mix-Ins: Once the ice cream is creamy, create a well down the center with a spoon. Add the toasted coconut and chopped pineapple. Lock the pint back in and select the “MIX-IN” function.
- Enjoy: Your creamy, dreamy piña colada ice cream is ready! Scoop it out and enjoy immediately.
Notes
- Serving Suggestions: Serve this ice cream directly from the pint, or scoop it into a bowl. For a fun, tropical look, use a hollowed-out pineapple half as a serving dish. You can even drizzle it with a touch of light rum for a boozy kick.
- Tips & Tricks: The key to this recipe is freezing the base for a full 24 hours. The mixture needs to be completely solid for the Ninja Creami to create that perfect, velvety texture.
- Storage & Reheating: Store any leftovers in the pint container. When you’re ready to eat it again, just let it sit on the counter for a few minutes to soften slightly, then re-spin it on the “Lite Ice Cream” setting to get that smooth texture back.