
Alright, let’s be honest. Who doesn’t love ice cream? Especially when it’s that time of year where everything is peppermint-flavored. But what if you could have that festive flavor without all the guilt?
That’s the magic of this recipe. It’s a simple, elegant recipe that lets the Ninja Creami do all the heavy lifting. I can’t wait to walk you through how to create a pint of creamy, dreamy ice cream that tastes like a holiday dessert but fits right into your healthy lifestyle.
Recipe Overview
This recipe for Peppermint Protein Ice Cream is a game-changer. It’s more of a “set it and forget it” kind of dish. You spend just a few minutes getting things ready, and then you wait for the deliciousness.
Prep and Cook Time:
The hands-on time for this recipe is about 5 minutes to get all your ingredients blended and in the pint. The freezing time is the longest part—a full 24 hours in the freezer to make sure the base is rock-solid. The actual “cooking” time in the machine is only a couple of minutes. So the total process is about 1 day and 5 minutes.
Servings and Scaling:
This recipe is perfectly portioned for a single pint, giving you one generous serving. It’s a fantastic way to satisfy a craving without a whole batch of ice cream tempting you. If you want to make more, it’s incredibly simple! Just prepare a new base for each pint. You can even create different flavors at the same time.
| Number of Pints | Total Almond Milk (oz) | Total Protein Powder (scoops) |
| 1 | 12 | 1 |
| 2 | 24 | 2 |
| 3 | 36 | 3 |
| 4 | 48 | 4 |
Difficulty Level:
I would rate this as an easy recipe. There are no complex techniques or difficult steps. If you can measure, pour, and press a button, you can make this ice cream. The key is simply having a little patience for the freezing time!
Equipment Needed:
The most important piece of equipment is, of course, the Ninja Creami. You’ll also need a Ninja Creami pint container for the base. To mix the ingredients, a small blender or an immersion blender works best for a smooth, lump-free base, but you can also just use a whisk. For the mix-ins, a rolling pin and a kitchen towel are perfect for crushing your candy.
Ingredients
One of the best parts of this recipe is how a few simple ingredients combine to create something truly magical. The key is using the right components to create a base that freezes solid but becomes unbelievably creamy in the Ninja Creami.
Full Ingredient List
For a perfect pint of Peppermint Protein Ice Cream with Almond Milk, you’ll need the following:
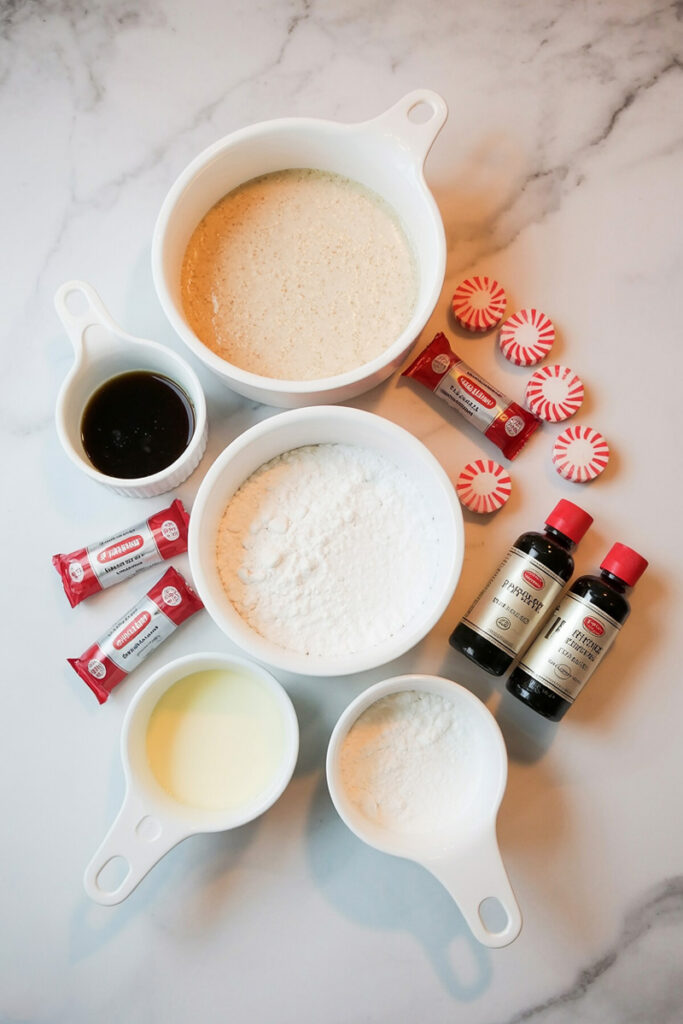
- 12 Ounces Unsweetened Almond Milk: The fluid base of our ice cream.
- 1 Scoop Unflavored Whey Protein Powder: This is what gives us the protein boost and contributes to the creamy texture.
- 2 Tablespoons Swerve Sugar Substitute (Granulated): Our sweetener to balance the flavor.
- ½ Tablespoon Vanilla Bean Paste: For a rich, deep vanilla flavor.
- ⅛ Teaspoon Peppermint Extract: A little bit goes a long way to give that signature peppermint punch.
- 4 Drops Red Food Coloring: This is optional, but it gives the ice cream that classic minty pink look!
- ¼ Teaspoon Guar Gum: Our secret weapon for a creamy, smooth texture.
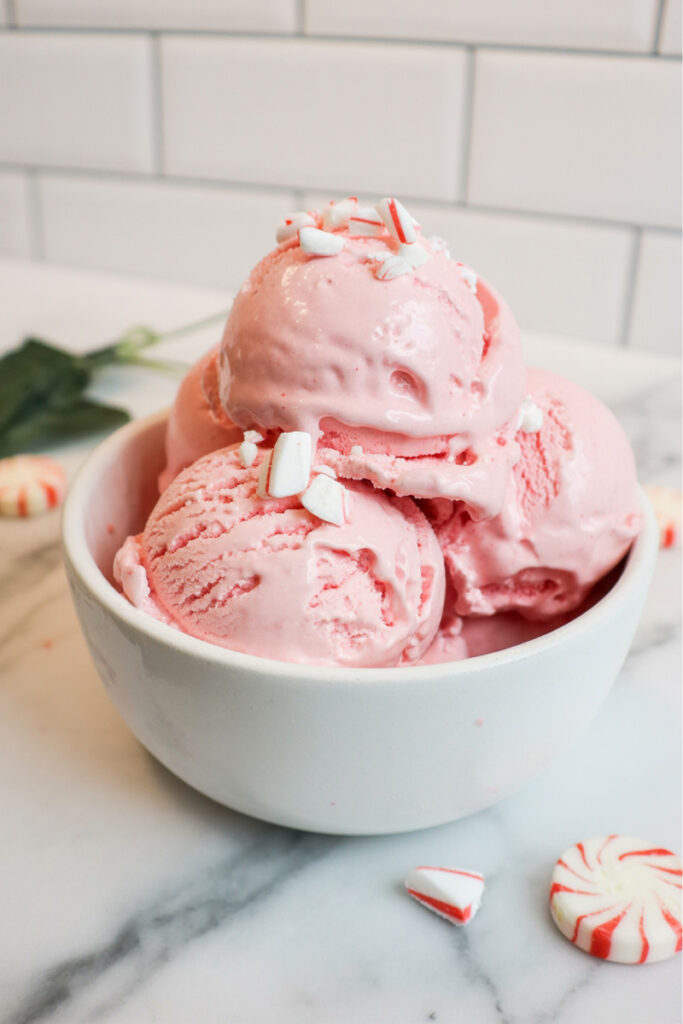
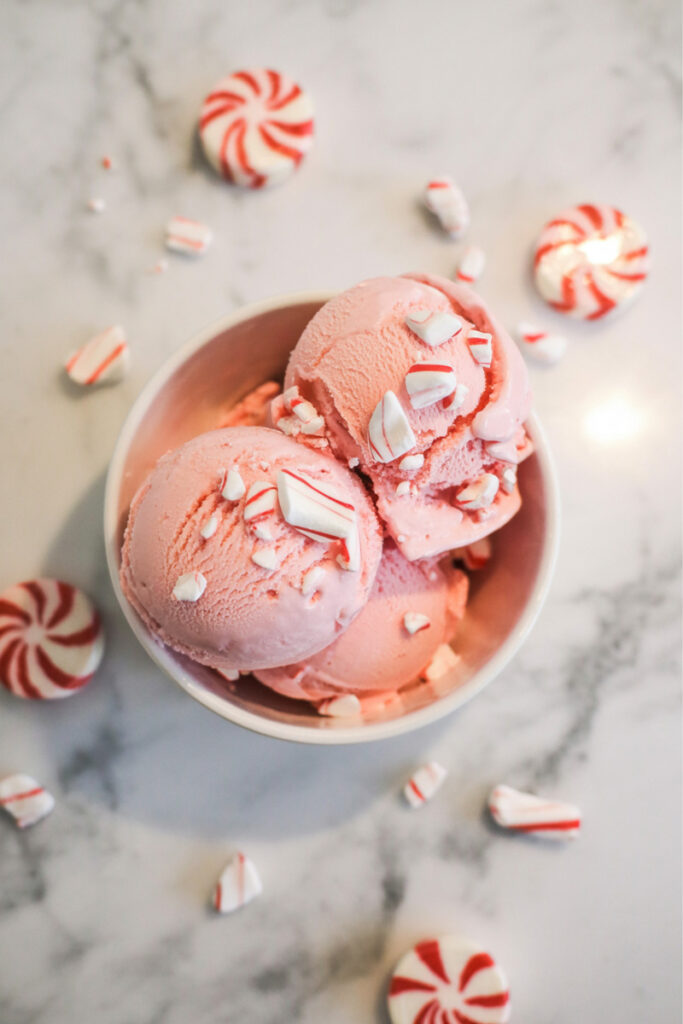
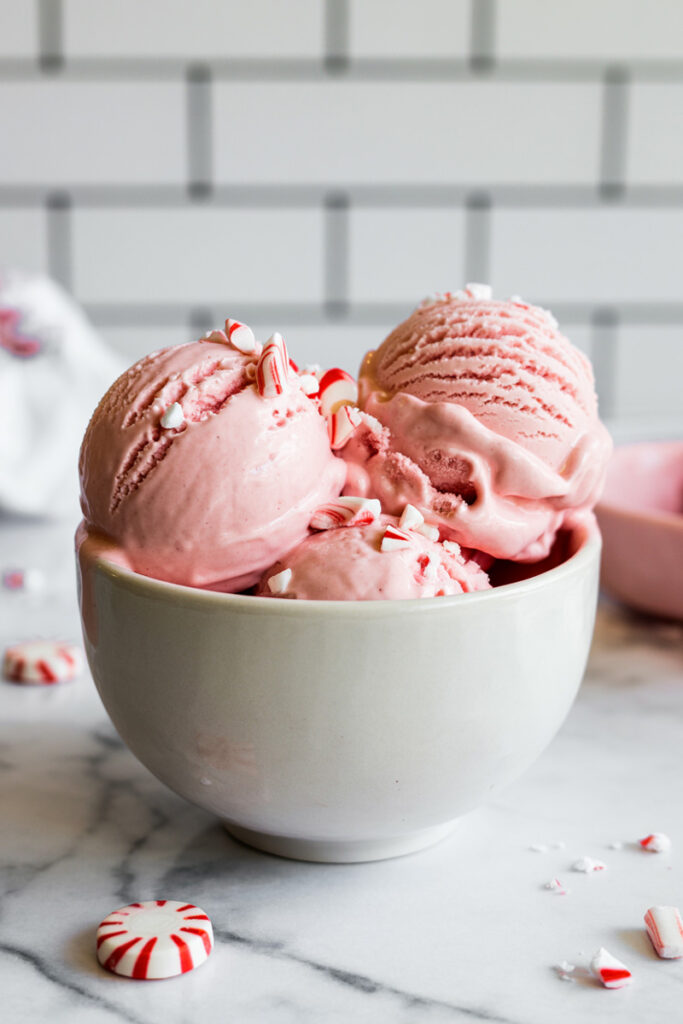
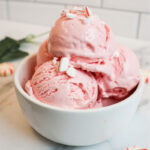
- 6 Crushed Starlight Mints: Our mix-in for that delightful peppermint crunch.
- 1-2 Tablespoons Unsweetened Almond Milk (Optional): This is for respins if needed.
Ingredient Substitutions & Notes
I’ve learned from my own kitchen experiments and research that this recipe is incredibly forgiving and open to customization. Here are some of the best substitutions and notes I’ve found:
- Milk: While unsweetened almond milk works great, you can swap it for other liquids.1 For a richer, higher-protein base, I’ve had fantastic results with Fairlife skim milk. Other options like oat milk, cashew milk, or even whole milk will work well but may change the final macros and consistency.
- Protein Powder: If you don’t have unflavored protein, you can use vanilla, or even a pre-flavored peppermint mocha or chocolate protein powder. If you go this route, you may want to adjust the sweetener and extracts to your taste.
- Sweetener: Swerve is a great sugar substitute, but feel free to use your favorite. Monk fruit, stevia, or granulated sugar will all work. Just be sure to adjust the quantity to your preferred level of sweetness.
- Thickener: Guar gum is what gives this ice cream its amazing, thick texture without using a lot of calories. However, you can substitute it with xanthan gum, or even a sugar-free pudding mix. Just be careful with the amount, as a little too much can give the ice cream a gummy or powdery texture.
- Extracts: It’s super important to use peppermint extract, not “mint” or “spearmint” extract, as those can give the ice cream a strange, toothpaste-like flavor.
Step-by-Step Method
This is the fun part! Let’s get our hands dirty (just a little) and bring this delicious Peppermint Protein Ice Cream with Almond Milk to life.
1. Prepare the Ice Cream Mixture
First, let’s create our base. Pour your unsweetened almond milk, protein powder, sugar substitute, vanilla bean paste, peppermint extract, and guar gum into a small blender. If you’re using it, add the red food coloring now. Blend everything together until it’s completely smooth and no protein powder lumps remain. The mixture should be a beautiful pale pink if you’ve used the food coloring. Pour this smooth, liquid base into your Ninja Creami pint container.
2. Freeze on a Level Surface
Now for the waiting game. Place the container in your freezer, making sure it’s sitting on a perfectly level surface. This is a crucial step to ensure the frozen mixture is flat and won’t hit the machine’s blade. To prevent a frozen “hump” from forming on the top, a pro tip is to freeze the mixture with the lid off of the container. Make sure your freezer is set to a temperature between 9°F and -7°F for the best results. The mixture needs to freeze for a minimum of 24 hours to become a solid, dense block.
3. Process the Ice Cream
After 24 hours, it’s time for the magic! Remove the frozen pint from the freezer and place it into the Ninja Creami outer bowl. Lock the lid and press the “LITE ICE CREAM” button. The machine will do its work, churning the dense frozen block into a light and airy consistency.
As the blade spins, listen for the sound of it cutting through the ice. It’s a powerful sound that tells you it’s working properly! Once it finishes, the texture might be a little dry and crumbly, almost like sand. Don’t worry, this is a very common mistake for beginners and a very easy fix. This is your cue to respin.
4. Adjust and Respin
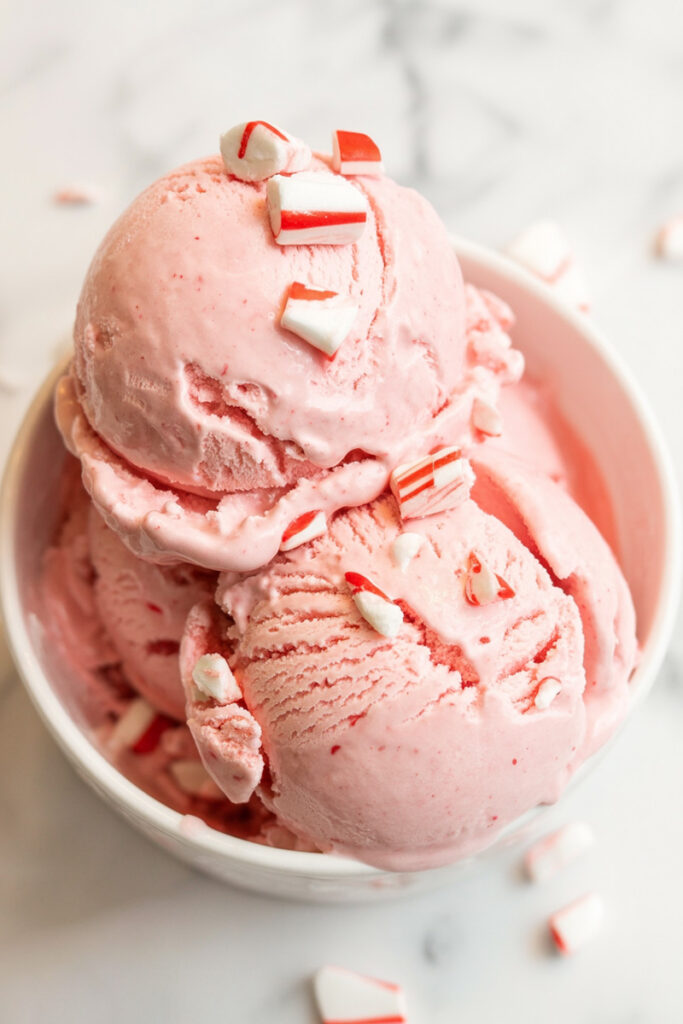
If the ice cream is dry or crumbly, take a moment to add a tablespoon or two of unsweetened almond milk to the top and then re-spin it. This little bit of liquid will help the machine create that creamy, smooth consistency we’re looking for. If the ice cream looks like “dippin dots” (little frozen balls), simply re-spin without adding any liquid. You may have to repeat this a couple of times. When it’s ready, the texture will be transformed into something that looks and feels like traditional soft-serve ice cream.
5. Add Your Mix-ins
Now for the final flourish! Take your crushed starlight mints and dig a well down the center of the ice cream. Pour the crushed candy into this well. Place the pint back in the machine and press the “MIX-IN” button. The machine will perfectly blend the candy throughout the ice cream, ensuring every spoonful has a little crunch.
Variations & Customization
This recipe is a fantastic starting point, but the fun really begins with customization.
- Dietary Modifications: To make this recipe completely dairy-free, simply use an unsweetened almond, cashew, or oat milk and be sure to select a dairy-free or plant-based protein powder.
- Fancy vs. Everyday Versions: For an extra decadent treat, try adding some sugar-free chocolate shavings as a mix-in, or drizzle the final product with a rich, dark chocolate sauce. For an everyday version, simply omit the mix-ins and enjoy a classic, smooth peppermint ice cream.
- Seasonal Adaptations: Peppermint is a holiday favorite, but you can adapt this recipe for any time of year! Swap out the peppermint extract for other flavors like almond, cinnamon, or even a little rum extract for a festive kick. You can even experiment with other sugar-free pudding mixes, like cheesecake or butterscotch.
Serving & Storage
Once your delicious Peppermint Protein Ice Cream is ready, it’s time to enjoy it!
- Plating Suggestions: This ice cream is best served immediately, straight from the pint. A quick scoop into a fun dish or a waffle cone makes it feel extra special. No need for side dishes here—this is a perfect standalone dessert.
- Storage Instructions: If you have any leftovers, simply smooth the top of the ice cream with a spoon, replace the lid, and put the pint back in the freezer. When you want to enjoy it again, it will be rock solid. Just re-spin it on the “LITE ICE CREAM” setting and it will be ready to go again!
I hope this guide helps you create a truly fantastic and guilt-free dessert. Happy cooking!
PrintNinja Creami Peppermint Protein Ice Cream
Craving a sweet treat that won’t derail your diet? This simple recipe turns a few basic ingredients into a rich, creamy, and guilt-free peppermint ice cream, all thanks to the magic of the Ninja Creami.
- Prep Time: 5 minutes
- Cook Time: None
- Total Time: 1 day, 5 minutes (includes 24-hour freeze time)
- Yield: 1 pint 1x
- Category: Dessert
- Cuisine: American
Ingredients
- 12 oz unsweetened almond milk
- 1 scoop unflavored whey protein powder
- 2 tbsp Swerve granulated sugar substitute
- ½ tbsp vanilla bean paste
- ⅛ tsp peppermint extract
- 4 drops red food coloring (optional)
- ¼ tsp guar gum
- 6 crushed starlight mints
Instructions
- Blend the Base: In a small blender, combine the almond milk, protein powder, Swerve, vanilla bean paste, peppermint extract, guar gum, and optional food coloring. Blend until completely smooth with no lumps.
- Freeze: Pour the mixture into a Ninja Creami pint container. Place it in the freezer on a level surface for at least 24 hours until it’s a solid block.
- Process: Place the frozen pint into the outer bowl and lock the lid. Select the “LITE ICE CREAM” setting. The machine will churn the solid block into a light, airy texture.
- Respin (if needed): If the ice cream is powdery or crumbly, add 1-2 tablespoons of almond milk and respin. You might need to do this a couple of times.
- Add Mix-ins: Once the ice cream is creamy, create a well in the center. Add the crushed starlight mints to the well. Place the pint back in the machine and press the “MIX-IN” button.
Notes
- Serving Suggestions: This ice cream is best served immediately. Enjoy it straight from the pint or scoop it into a dish for a classic treat.
- Tips & Tricks: Guar gum is the secret to a creamy texture. You can substitute it with xanthan gum or sugar-free pudding mix, but be careful with the amount—a little goes a long way!
- Storage: Store any leftovers in the pint container in the freezer. When you’re ready to eat it again, the ice cream will be solid. Just put it back in the Ninja Creami and re-spin it on the “LITE ICE CREAM” setting.