
Hey friends, let me show you my secret to an amazing dessert. I’m a huge fan of sweet treats, but I also try to eat a lot of protein. For a long time, I couldn’t find a snack that did both. That is, until I discovered this recipe. It’s an easy, high-protein dessert that tastes like a legit Reese’s Peanut Butter Cup.
The secret to this recipe? The Ninja Creami.
It completely changes the game for homemade ice cream. With this machine, you can turn a simple liquid into a perfectly creamy, dreamy pint of ice cream. It gives you that same awesome texture you’d get at an ice cream shop.
This recipe gives you all that classic chocolate and peanut butter flavor you crave, but with a bonus: a ton of protein. It’s the perfect post-workout snack or a delicious late-night treat that won’t leave you feeling guilty.
Recipe at a Glance
Making this delicious dessert is surprisingly easy. Most of the work is done by your freezer and the Ninja Creami. I love how simple this recipe is. You basically just “set it and forget it.”
- Prep Time: 5 minutes. That’s all it takes to mix the base ingredients.
- Freeze Time: 24 hours. You need to be patient here while the magic happens.
- Total Time: About 24 hours and 5 minutes.
- Servings: One big pint, perfect for a single serving.
- Difficulty: Easy. Seriously, the hardest part is waiting for it to freeze.
The good news? This recipe is super easy to double or triple. Just remember to use a separate Ninja Creami pint for each batch, since the machine only works on one at a time.
What You’ll Need
- Ninja Creami Machine: This is the star of the show. There’s no substitute that will give you the same perfect texture.
- Ninja Creami Pint Containers: You’ll need one for freezing your base.
- Small Blender or Immersion Blender: This makes your base super smooth before freezing. A whisk works in a pinch, but a blender is your best bet for a lump-free mixture.
I’m all about meal prepping, and this recipe is perfect for it. I like to make a few pints of the base at once and store them in the freezer. Then, when I have a craving, all I have to do is pop a pint into the Ninja Creami. I get a fresh, homemade treat in just a few minutes!
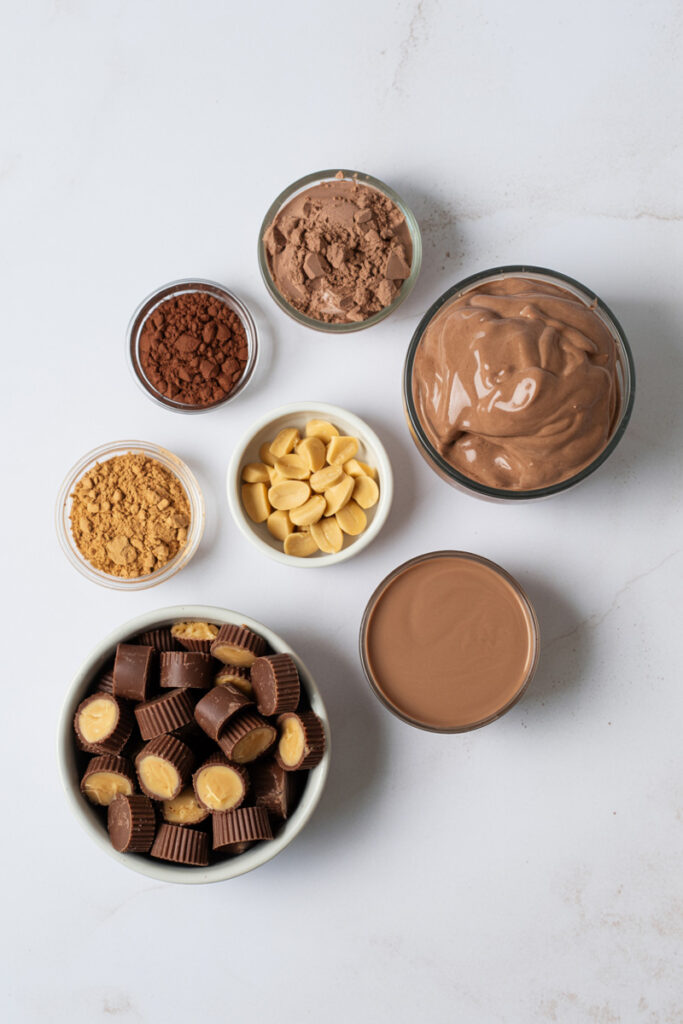
The Ingredients
This recipe has a short and simple ingredient list. But each ingredient plays a huge role in getting that creamy texture and classic flavor.
| Ingredient | Measurement | Notes & Substitutions |
| Chocolate Protein Shake | 326 g | I love using Fairlife brand. For a vegan option, use a plant-based chocolate protein shake. |
| Sugar-Free Instant Chocolate Fudge Pudding Mix | 2 tbsp | This is my secret weapon! It thickens the base and makes it so creamy. Do not skip this ingredient! |
| Dark Cocoa Powder | 1 tsp | This gives the ice cream a rich, deep chocolate flavor. You can use regular cocoa powder, but the dark kind makes a big difference. |
| PB Fit Peanut Butter Powder | 2 tbsp | This is essential for the peanut butter flavor without all the fat. You can use regular peanut butter, but it will change the texture and nutrition. |
| Zero Sugar Peanut Butter Cups | 3 | I use the zero-sugar kind, but feel free to use regular ones if you want a richer treat. |
| Chocolate Almond Milk | 1-2 tbsp (optional) | Use this if you need to “re-spin” your ice cream. Any milk will do. |
For the best results, start with the liquid. Pour the chocolate protein shake into your blender first. This helps you mix in the dry ingredients without any clumping.
The sugar-free pudding mix is key. It helps turn a liquid into a creamy, scoopable ice cream without using high-fat ingredients. I also love using dark cocoa powder to give it that deep, rich flavor you find in gourmet desserts. The PB Fit powder is the final touch, adding that distinct nutty flavor that goes perfectly with the chocolate.
The Step-by-Step Method
Let’s walk through this process together. It’s so simple, it almost feels like magic.
1. Making the Ice Cream Base
First, pour your chocolate protein shake into a blender. This is your foundation. Next, add the dry stuff: the sugar-free pudding mix, the dark cocoa powder, and the PB Fit powder. Now, blend everything until you have a smooth liquid. It should be thin, like a milkshake, but with a little thickness from the pudding and cocoa. Once it’s silky smooth, pour the mix into your Ninja Creami pint.
Pro Tip: For a perfectly flat top, which is super important for the Ninja Creami, freeze your pint without the lid. This prevents air pockets from forming and ensures an even freeze. Make sure your freezer is set to the right temperature (between 9 and -7°F). You’ll know it’s ready when the entire pint is solid, like a hockey puck.
2. Processing the Ice Cream
After at least 24 hours, take your frozen pint out of the freezer. Place it in the outer bowl of the Ninja Creami, lock it into place, and press the “LITE ICE CREAM” button. The machine will do all the hard work for you.
When it’s done, don’t freak out if it looks crumbly and powdery. This is a very common result. The key is to know what to do next.
Common Mistake: Don’t add your mix-ins yet! You have to get the base creamy first.
3. Re-spinning for Perfection
Now, let’s turn that crumbly base into a creamy dream. Add a tablespoon or two of chocolate almond milk (or whatever milk you have) to the pint. This little bit of liquid is enough to rehydrate the mixture. Put it back in the machine and hit the “RESPIN” button. The sound will change, and after a minute or two, the machine will transform the texture into a smooth, thick, and perfectly creamy ice cream.
You’re looking for a scoopable, velvety consistency with no visible ice crystals. If it’s still a bit crumbly, just add another splash of milk and re-spin one more time.
4. Adding the Mix-Ins
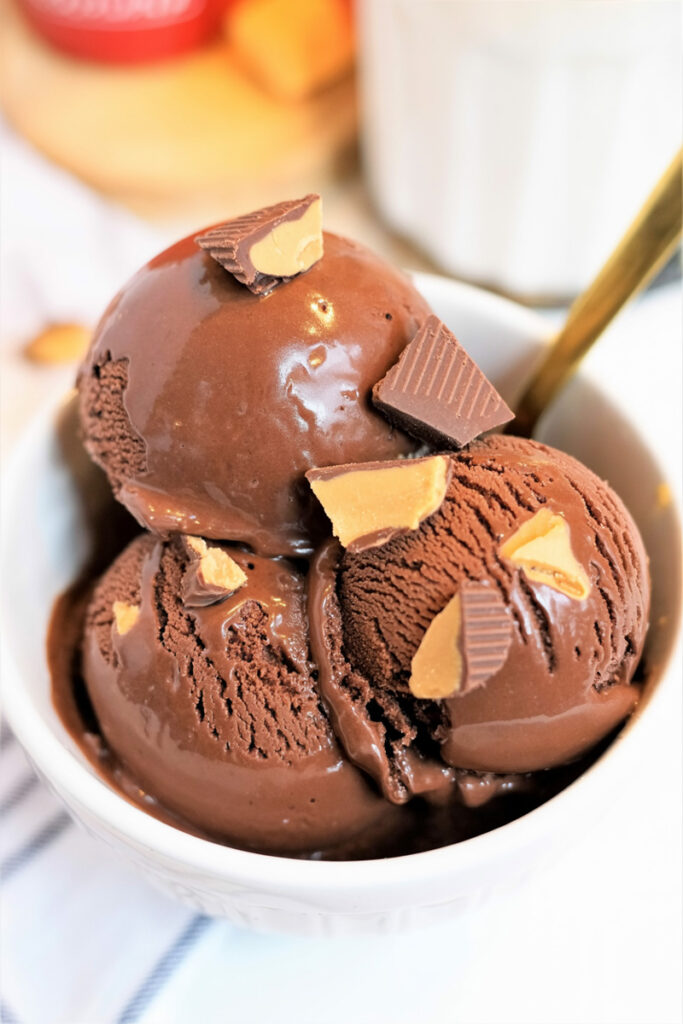
Finally, for the best part—the mix-ins! Once your ice cream is perfectly creamy, use a spoon to dig a well down the center. Drop in your chopped peanut butter cups. Place the pint back in the machine, and press the “MIX-IN” button. The machine will gently fold in all that delicious goodness, making sure every spoonful has a bit of chocolate and peanut butter.
Variations & Customization
This recipe is a great starting point, but you can change it up however you like. The sky is the limit!
- Dietary Tweaks: For a vegan or dairy-free version, use a plant-based protein shake and dairy-free milk. Use vegan-friendly peanut butter cups. If you need it gluten-free, just make sure your pudding mix is certified as such.
- Fancy vs. Everyday: For a richer, more decadent version, use a higher-fat protein shake or whole milk. You can also add more peanut butter cups or a swirl of creamy peanut butter during the mix-in stage. A drizzle of chocolate fudge or a sprinkle of flaky sea salt can also make it feel like a gourmet dessert.
Serving & Storing
You’ve put in the work—or rather, the Ninja Creami has—so make sure you enjoy your creation to the fullest.
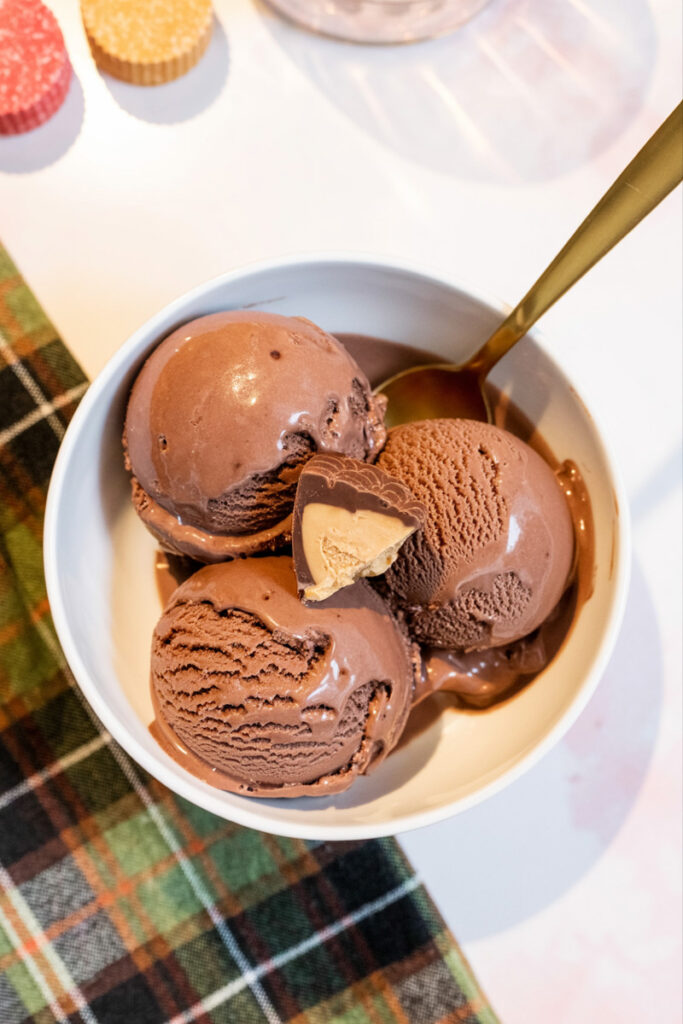
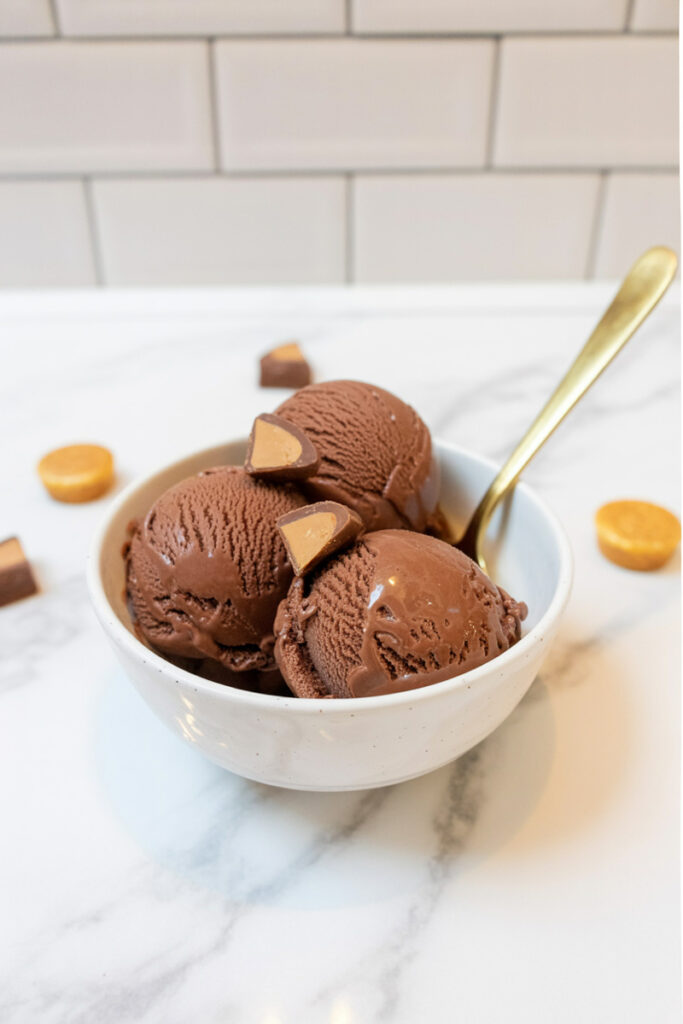
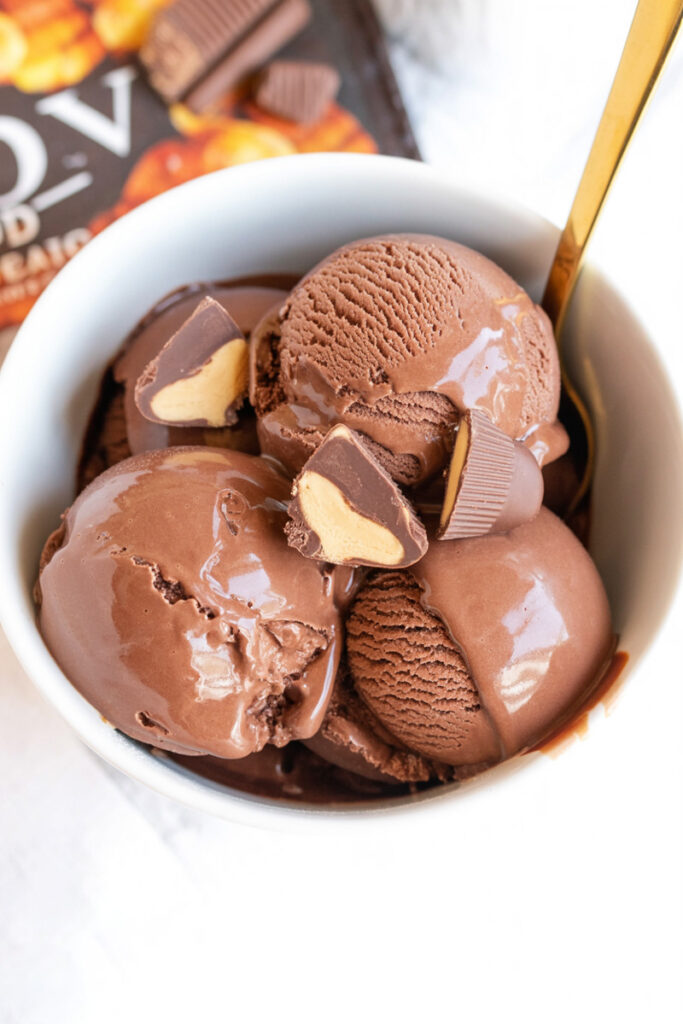
- Plating: This ice cream is best served straight from the pint. Grab a spoon and dig in! If you want to get fancy, scoop it into a bowl and top with a few extra chopped peanut butter cups, some chocolate sauce, and a dusting of cocoa powder.
- Storage: This recipe is perfect for making ahead. The beauty of this dessert is that it freezes perfectly. Just put the lid back on the pint and store it in your freezer.
- Leftovers: Unlike regular ice cream, this version can freeze solid after being processed. If you have leftovers, just give the pint a quick re-spin in the Ninja Creami with no added liquid. It will come back to that perfect, creamy consistency every time. No microwave needed!
Ninja Creami Chocolate Peanut Butter Cup Protein Ice Cream
The perfect solution for a high-protein dessert that tastes just like your favorite candy bar. This Ninja Creami recipe is easy, delicious, and will help you hit your macros without sacrificing flavor.
- Prep Time: 5 minutes
- Cook Time: None
- Total Time: 24 hours 5 minutes (includes 24-hour freeze time)
- Yield: 1 Pint 1x
- Category: Dessert
- Cuisine: American
Ingredients
- 326 g Chocolate Protein Shake (like Fairlife)
- 2 tbsp Sugar-Free Instant Chocolate Fudge Pudding Mix
- 1 tsp Dark Cocoa Powder
- 2 tbsp PB Fit Peanut Butter Powder
- 3 Zero Sugar Peanut Butter Cups, chopped
- 1–2 tbsp Chocolate Almond Milk (for re-spin)
Instructions
- Mix the Base: Pour the chocolate protein shake into a blender. Add the pudding mix, cocoa powder, and peanut butter powder. Blend until completely smooth.
- Freeze: Pour the liquid base into a Ninja Creami pint. Place it in the freezer without the lid for at least 24 hours, until it’s a solid block.
- Process: Take the frozen pint out and place it in the outer bowl of your Ninja Creami. Lock it in and press the “LITE ICE CREAM” button. The result will likely be a crumbly powder.
- Re-spin: Add 1-2 tablespoons of chocolate almond milk to the pint. Put it back in the machine and hit the “RESPIN” button. This will transform the texture into a smooth, creamy ice cream.
- Add Mix-ins: Use a spoon to dig a well in the center of the ice cream. Drop in the chopped peanut butter cups. Place the pint back in the machine and press the “MIX-IN” button to fold in the candy.
- Serve: Grab a spoon and enjoy your delicious, creamy creation straight from the pint!
Notes
- Serving Suggestions: This ice cream is best right out of the machine. For a fancier touch, scoop it into a bowl and top with a little extra chocolate sauce or a sprinkle of flaky salt.
- Tips & Tricks: The instant pudding mix is your secret weapon for a truly creamy texture. Don’t skip it! For the best results, make sure your freezer is set between 9 and -7°F.
- Storage & Reheating: Store any leftovers in the freezer with the lid on. If it freezes solid again, just give it a quick re-spin in the Ninja Creami with no added liquid to bring it back to that perfect, creamy consistency.