
There’s just something about a Wendy’s Frosty.
Not a milkshake. Not ice cream.
It sits right in the middle.
You start with a spoon. Then, once it softens a little, you grab a straw. And suddenly you’re five years old again. Sitting in the back seat. Or sneaking fries into your chocolate cup and hoping no one judges you.
This homemade version keeps that same magic—but skips all the fuss.
No ice cream maker.
No stovetop.
No eggs.
Just four everyday ingredients, a blender, and a freezer. That’s it.
I’ve tried a lot of copycat versions over the years. Some freeze too hard. Others turn icy. The trick that makes this one different? Texture control. That quick whisk every 30 minutes changes everything. It’s the difference between “frozen chocolate milk” and that unmistakable Frosty feel.
And honestly?
It almost feels too easy.
Until you taste it.
Recipe Overview: What to Expect
When I make this Frosty, I treat it like a low-effort dessert with a big payoff. Most of the work happens while you’re doing literally anything else.
Time Commitment
The prep takes about five minutes. Just enough time to blend everything smooth. After that, the freezer takes over for about three hours. You’ll check on it a few times, give it a whisk, and move on with your day.
Servings & Scaling
This batch makes about four servings, depending on how generous you are with your scoops. If you’re serving kids or using smaller glasses, it stretches easily.
Doubling the recipe works great. I’ve done it more than once. Just don’t pour it all into one deep container. Two loaf pans freeze faster and more evenly. Think shallow, not tall.
Difficulty Level
Very beginner-friendly.
If you can use a blender and remember a timer, you’re golden.
Equipment (No Stress Here)
I usually grab:
- a blender
- a loaf pan
- a whisk
No blender? A food processor works fine.
No loaf pan? Any shallow freezer-safe dish will do. Just avoid deep bowls—they freeze unevenly and cause ice crystals.
Make-Ahead Friendly?
Absolutely. This Frosty actually likes a little time in the freezer. You can make it days ahead and refresh it before serving.
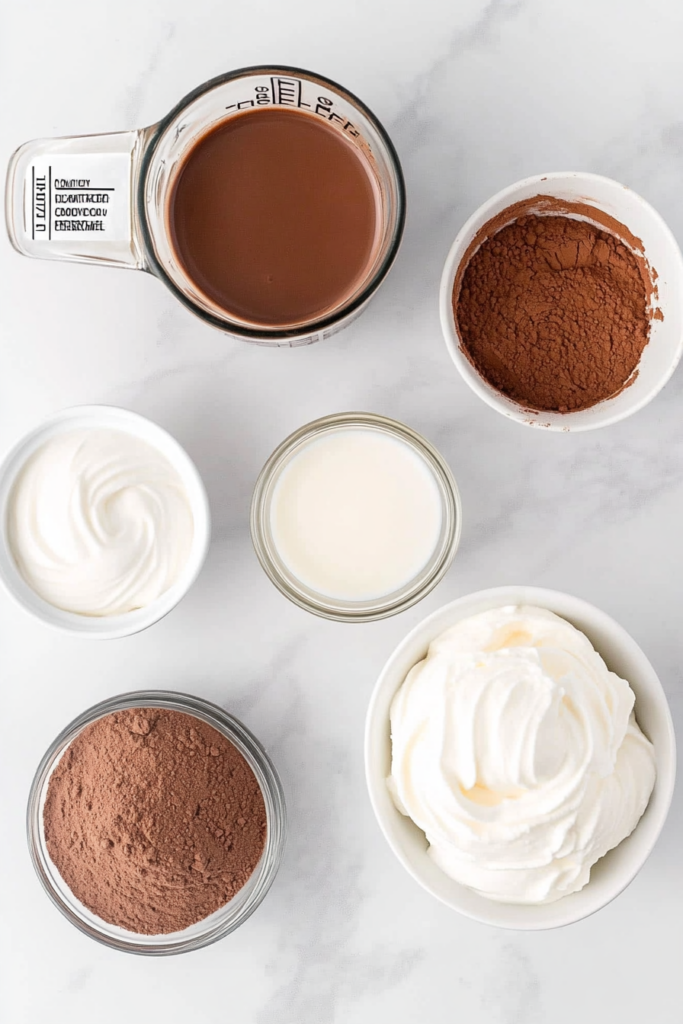
Ingredients: Why Each One Matters
This recipe works because every ingredient has a job.
The base is chocolate milk. It brings sweetness, cocoa flavor, and the right amount of liquid. Whole chocolate milk gives the creamiest result, but lower-fat versions still do the job surprisingly well.
Then there’s frozen whipped topping. It might feel like a shortcut, but it’s doing serious work behind the scenes. It adds air and structure—the same qualities that give a Frosty its soft, scoopable texture.
Next comes sweetened condensed milk. This is where the richness comes from. It thickens the mixture without eggs or cooking. Important note here: evaporated milk is not the same thing. Don’t swap it in.
Finally, cocoa powder deepens the chocolate flavor. Unsweetened cocoa is best. It keeps things balanced so the Frosty tastes rich and chocolatey, not overly sweet.
If you’re swapping ingredients, this recipe is forgiving. Dairy-free chocolate milk, condensed coconut milk, and non-dairy whipped toppings all work. Just read labels carefully—some whipped toppings still sneak in dairy.
One small tip: let the whipped topping soften at room temperature for a few minutes. It blends smoother that way.
Step-by-Step: Like We’re Cooking Together
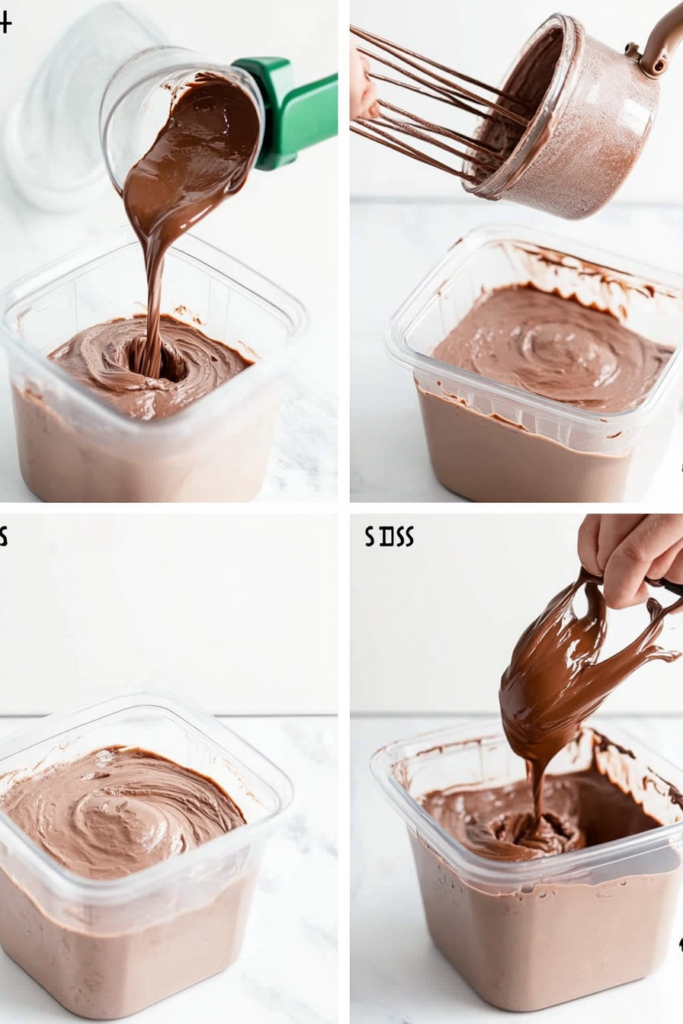
I start by adding everything straight into the blender. No special order. Just toss it all in.
As it blends, keep an eye on the texture. You’re looking for something smooth and silky. No cocoa clumps. No streaks. It should look like a thick chocolate milk or a loose milkshake. That’s your green light.
If it already looks stiff or frozen at this stage, something’s off. Usually it means too little liquid.
Once blended, pour the mixture into your pan and slide it into the freezer—no lid yet.
After about 30 minutes, check on it. The edges will start to freeze, but the center will still be liquid. That’s exactly when you whisk. You’re breaking up ice crystals and adding air back in.
Each whisk changes the texture a little more.
First round? Still pretty loose.
Second or third? Creamy. Thick. Milkshake-like.
Final round? Soft, scoopable, and holding gentle swirls.
One mistake I’ve made before? Forgetting a whisk. The Frosty still tasted good—but the texture wasn’t quite right. Think frozen drink instead of creamy dessert.
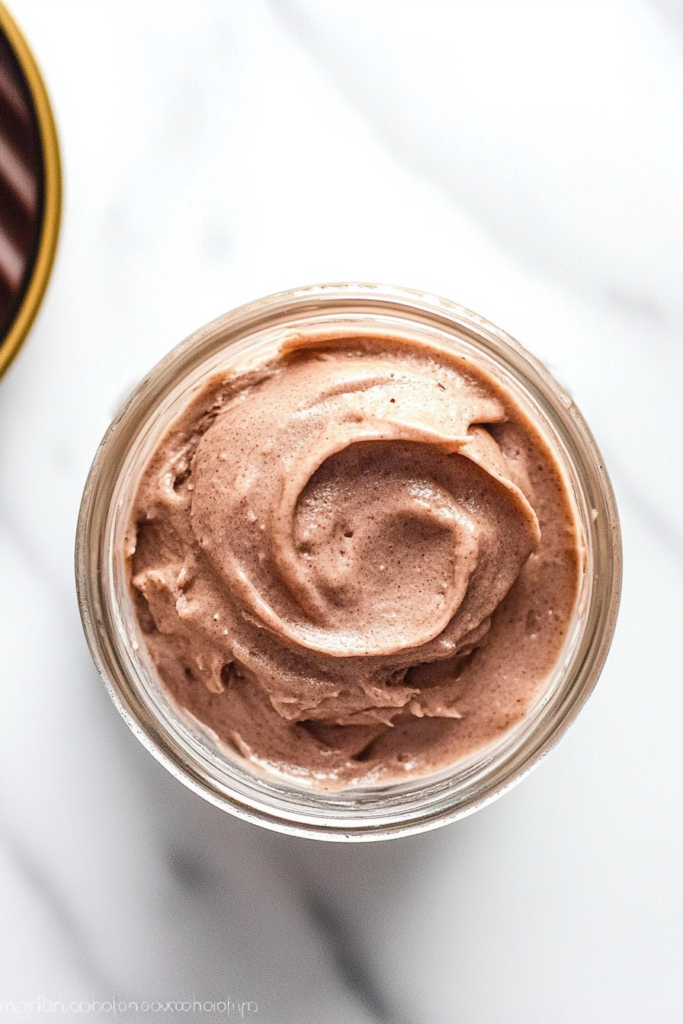
When it’s ready, it should feel cold and thick but not rock-solid. Smooth. No graininess. And the smell? Deep, rich chocolate.
That’s when you know.
Variations & Ways to Make It Your Own
This recipe is easy to customize.
It’s naturally gluten-free, and with a few swaps, fully vegan. Chocolate almond milk and condensed coconut milk work beautifully. The flavor changes slightly, but the texture stays spot-on.
If you want it richer, a spoonful of chocolate syrup or a pinch of espresso powder adds depth. For kids, dialing back the cocoa gives a softer chocolate flavor.
Feeling fancy? Top it with shaved chocolate or a drizzle of warm ganache.
Keeping it casual? Serve it plain. It doesn’t need help.
Season matters too. In summer, I freeze it a bit firmer so it holds up longer. In cooler months, I serve it softer—almost like a thick chocolate cream.

Serving & Storage Tips
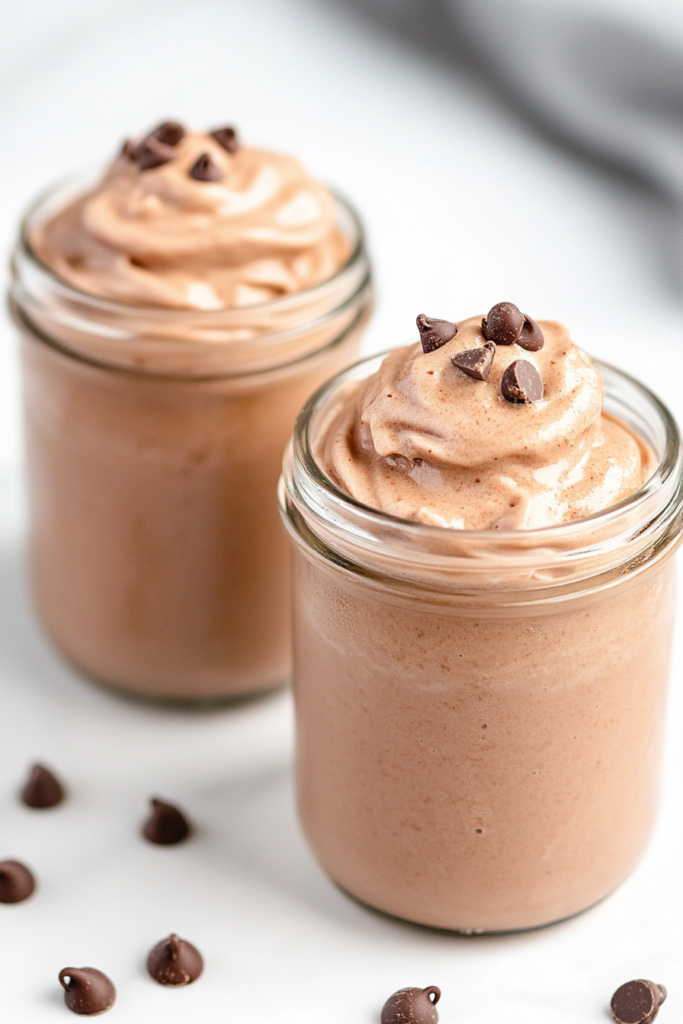
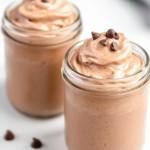
I love serving this Frosty in clear glasses so you can see that creamy texture. A spoon and a straw is the way to go. And yes—French fries on the side are encouraged.
It pairs beautifully with cookies, brownies, or anything crunchy that contrasts the creaminess.
For storage, cover it well and keep it frozen for up to one week. If it freezes solid, let it sit out for five to ten minutes. Then blend it briefly. That brings it right back to soft-serve texture.
This is one of my favorite make-ahead desserts for gatherings. It actually improves after resting in the freezer. A quick re-blend before serving, and no one will ever guess it wasn’t made fresh.
PrintHomemade Copycat Wendy’s Chocolate Frosty
A creamy, nostalgic chocolate dessert you can make at home with no machine. Spoon it or sip it—just like the Frosty from Wendy’s, only easier.
- Prep Time: 5 mins
- Total Time: 3 hrs 5 mins (With Freeze Time)
- Yield: 4 1x
- Category: Dessert
- Cuisine: American
Ingredients
4 cups chocolate milk – Use whole chocolate milk for the creamiest, richest Frosty texture.
8 oz frozen whipped topping (such as Cool Whip) – Adds lightness and that signature soft, airy Frosty feel.
7 oz sweetened condensed milk – Brings sweetness and body without the need for cooking or eggs.
1/4 cup cocoa powder – Deepens the chocolate flavor and balances the sweetness beautifully.
Instructions
Blend it smooth.
Add all ingredients to a blender. Blend until silky and smooth with no lumps. It should look like thick chocolate milk.
Freeze it.
Pour the mixture into a loaf pan or shallow freezer-safe dish.
Stir as it chills.
Freeze uncovered. Every 30 minutes, remove and whisk well to break up ice crystals. This step creates that soft, creamy Frosty texture.
Ready to serve.
After about 3 hours, it will be thick and scoopable. Serve in tall glasses with a straw or enjoy it the classic way with a spoon.
Notes
Serving Ideas:
Serve with salty French fries for the classic combo.
Add a swirl of whipped topping or shaved chocolate for extra flair.
Tips & Tricks:
Whisking frequently prevents hard ice crystals and keeps it soft, just like the real Frosty.
If it freezes too hard, let it sit at room temperature for 5–10 minutes before scooping.
For a thicker soft-serve style, use 3 cups chocolate milk instead of 4.
Storage & Reheat:
Store in a covered freezer dish for up to 1 week.
If frozen solid, re-blend briefly in the blender to restore a smooth, scoopable texture.
Nutrition
- Serving Size: 4
- Calories: 337kcal
- Sugar: 43g
- Sodium: 170mg
- Fat: 14g
- Saturated Fat: 10g
- Unsaturated Fat: 3.4g
- Carbohydrates: 46g
- Fiber: 3g
- Protein: 10g
- Cholesterol: 32mg